Guide by Hylosium:
In this guide we will show you how to deploy silverbullet and cloudflare in containers, making them “talk/communicate” in the same private network just for them.
This guide assumes that you have already deployed Portainer. If not, see this official guide from Portainer to deploy it on Linux.
Brief
This guide will be divided into three parts, in the first we’ll set up Silverbullet with Cloudflare. In the second, we will set up Cloudflare from the beginning to access Silverbullet from outside our LAN using Tunnels. And in the third step, we protect our Silverbullet instance with Access Zero Trust for authentication.
1 - Deploy Silverbullet and Cloudflare in Portainer
Prepare the Template
We will prepare a template in Portainer where we will add the configuration of a docker-compose.yaml that will run our containers, and we will be able to move the stack to another server/host if necessary using the same configuration.
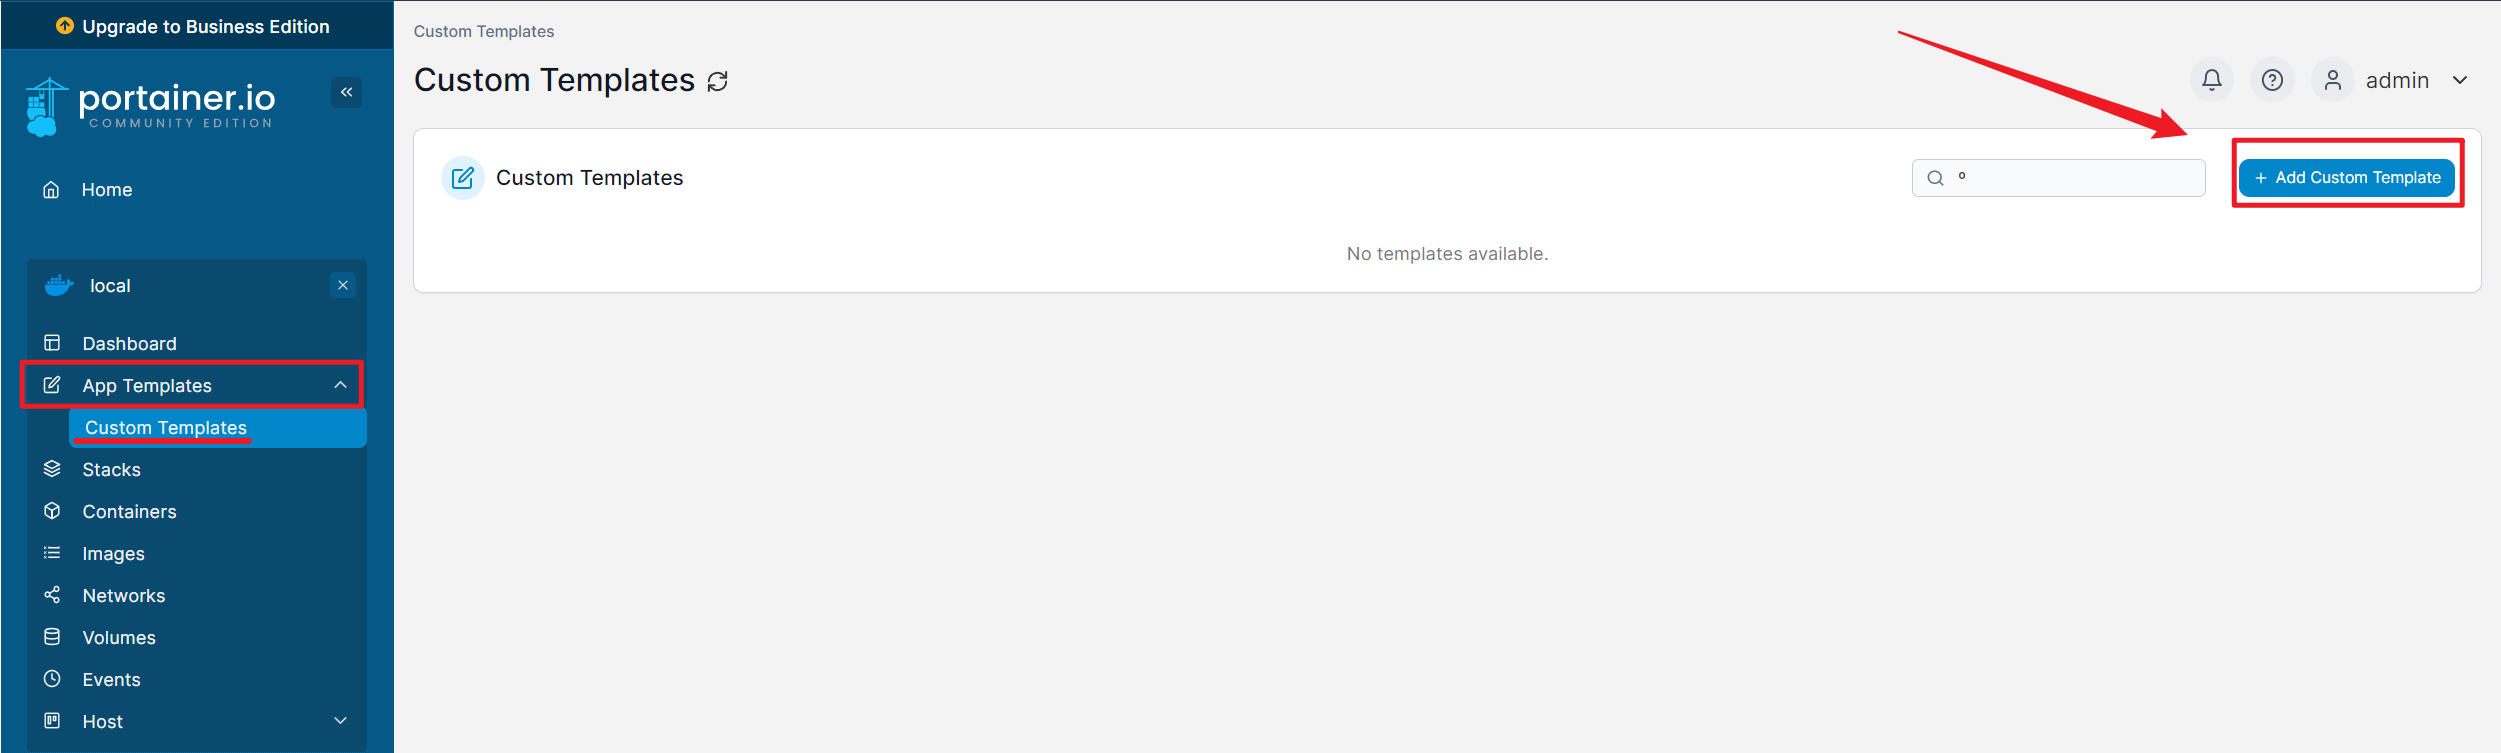
First, go to Home > (Your environment name, default is local) > App Templates > Custom Templates and click on the blue button in the right corner > “Add Custom Template”.
Name
Choose a name for the silverbullet stack, we chose “silverbullet-docker”, very imaginative… ![]() .
.
Description
Fill the description with your own words; this is up to you because it is optional.
Icon Url
Copy and paste this url to get the icon.
Platform
Choose Linux
Type
Standalone
Build Method
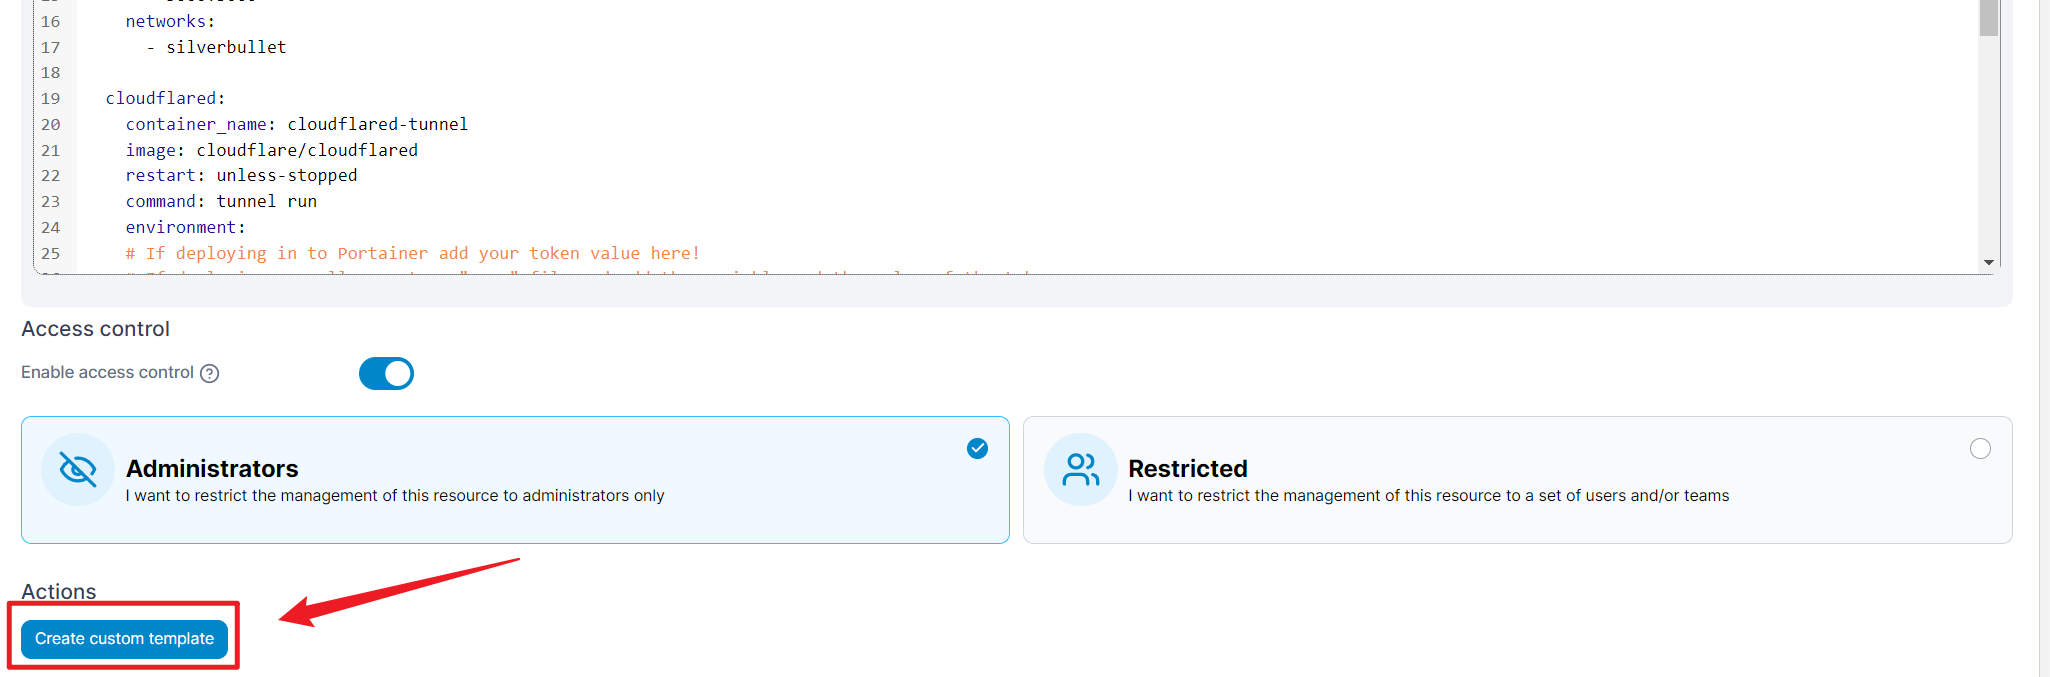
As for the Build method choose “Web Editor” and copy-paste this docker-compose.yaml configuration:
version: '3.9'
services:
  silverbullet:
    image: zefhemel/silverbullet
    container_name: silverbullet
    restart: unless-stopped
    ## To enable additional options, such as authentication, set environment variables, e.g.
    environment:
      - PUID=1000
      - PGID=1000
      #- SB_USER=username:1234 #feel free to remove this if not needed
    volumes:
      - space:/space:rw
    ports:
      - 3000:3000
    networks:
      - silverbullet

  cloudflared:
    container_name: cloudflared-tunnel
    image: cloudflare/cloudflared
    restart: unless-stopped
    command: tunnel run
    environment:
    # If deploying in to Portainer add your token value here!
    # If deploying manually create a ".env" file and add the variable and the value of the token.
      - TUNNEL_TOKEN=your-token-value-here!
      #- TUNNEL_TOKEN=${TUNNEL_TOKEN}
    depends_on:
      - silverbullet
    networks:
      - silverbullet

networks:
  silverbullet:
    external: true

volumes:
  space:
We will replace “your-token-value-here” with a real token value in the next steps.
Once you have this, go to the bottom of the page and click Actions > Create Custom Template.
Now we have to build the network before we can deploy it.
NOTE*: If you got a Error code 8: Attempt to write a readonly database when running docker compose up.
Ensure that the directory on the host system that is mounted as /space in your container has the correct permissions. For example:
sudo chown -R 1000:1000 /path/to/space
sudo chmod -R 755 /path/to/space
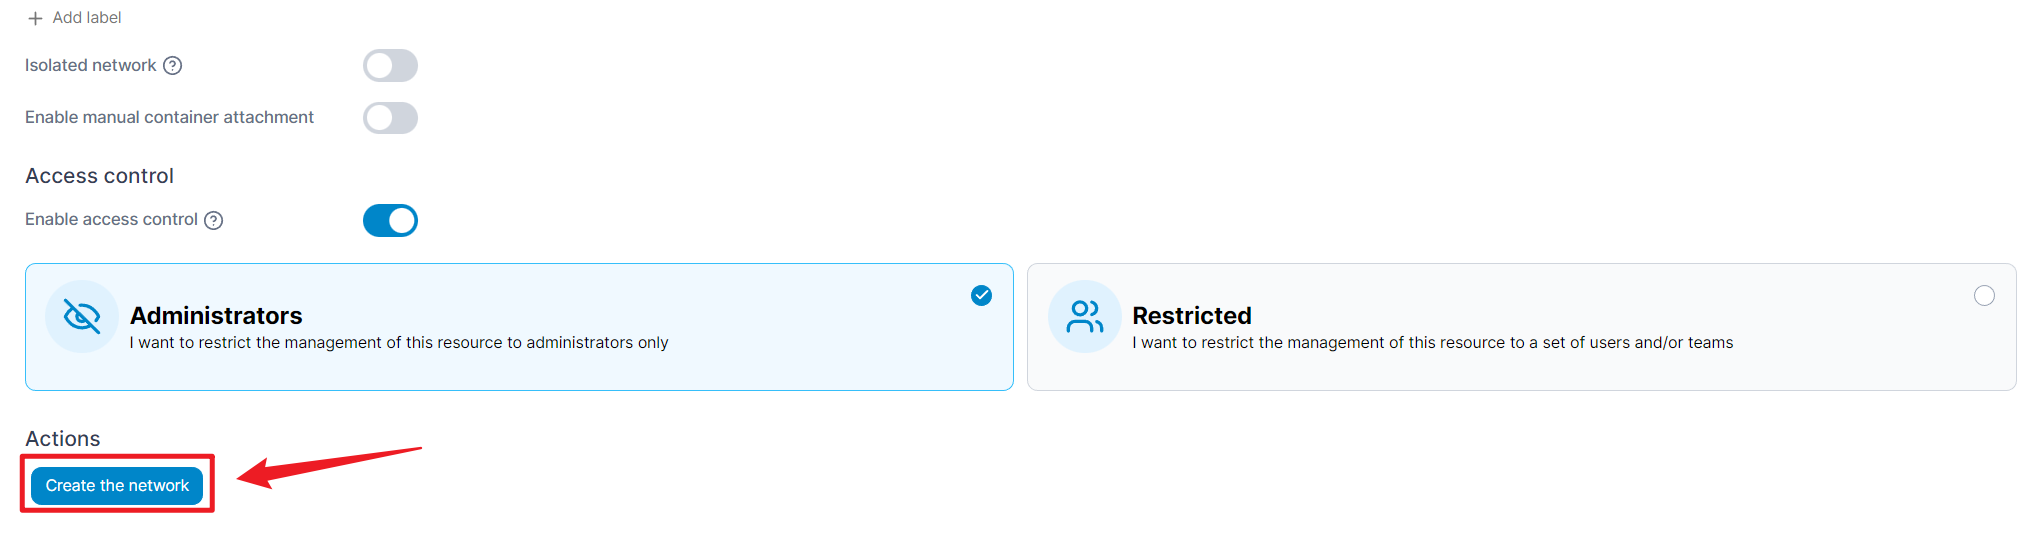
Create the network for silverbullet
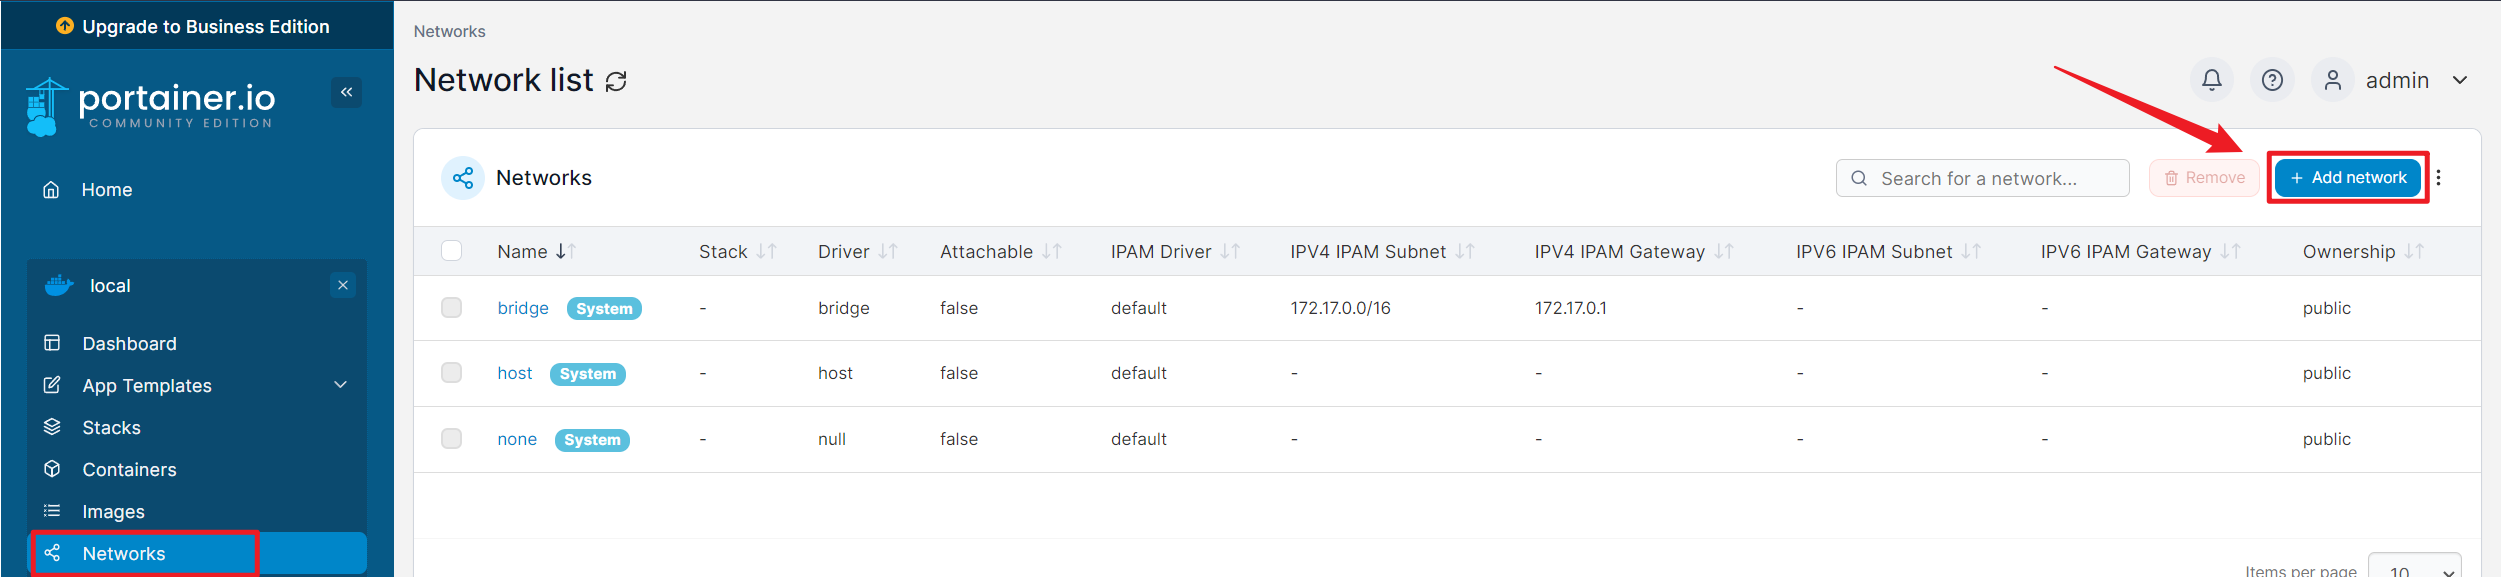
Go to Home > Networks > Add Network.
Name
Choose “silverbullet” because that is the name we are already using in the docker-compose.yaml.
You can leave all the other options by default or change them to suit your network needs.
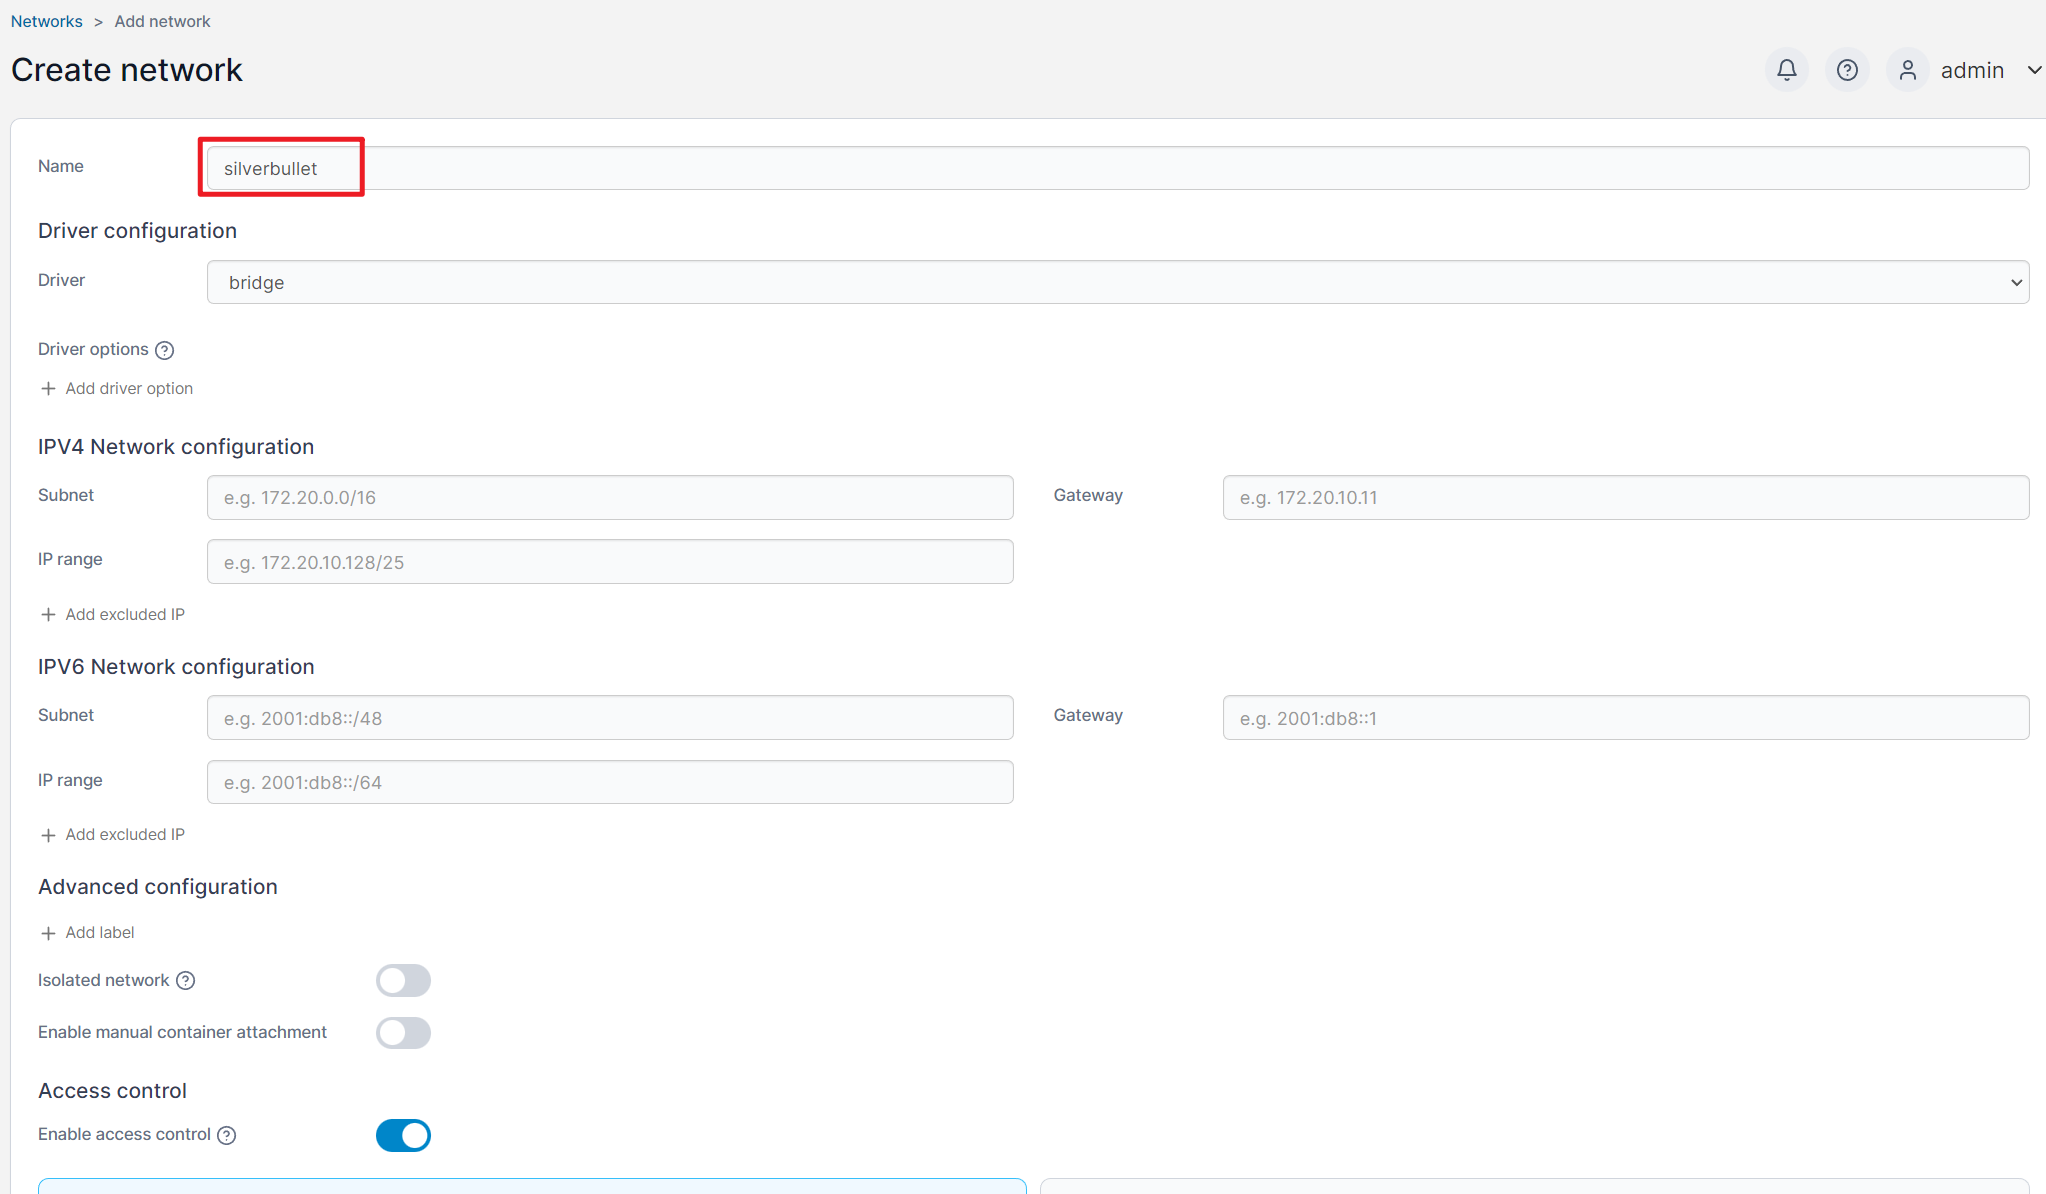
Click Create Network at the bottom of the page.
Deploying the Stack
Go to Home > Local > App Templates > Custom Templates.
Go into the silverbullet-docker and click on Edit.

Click on Deploy the stack.
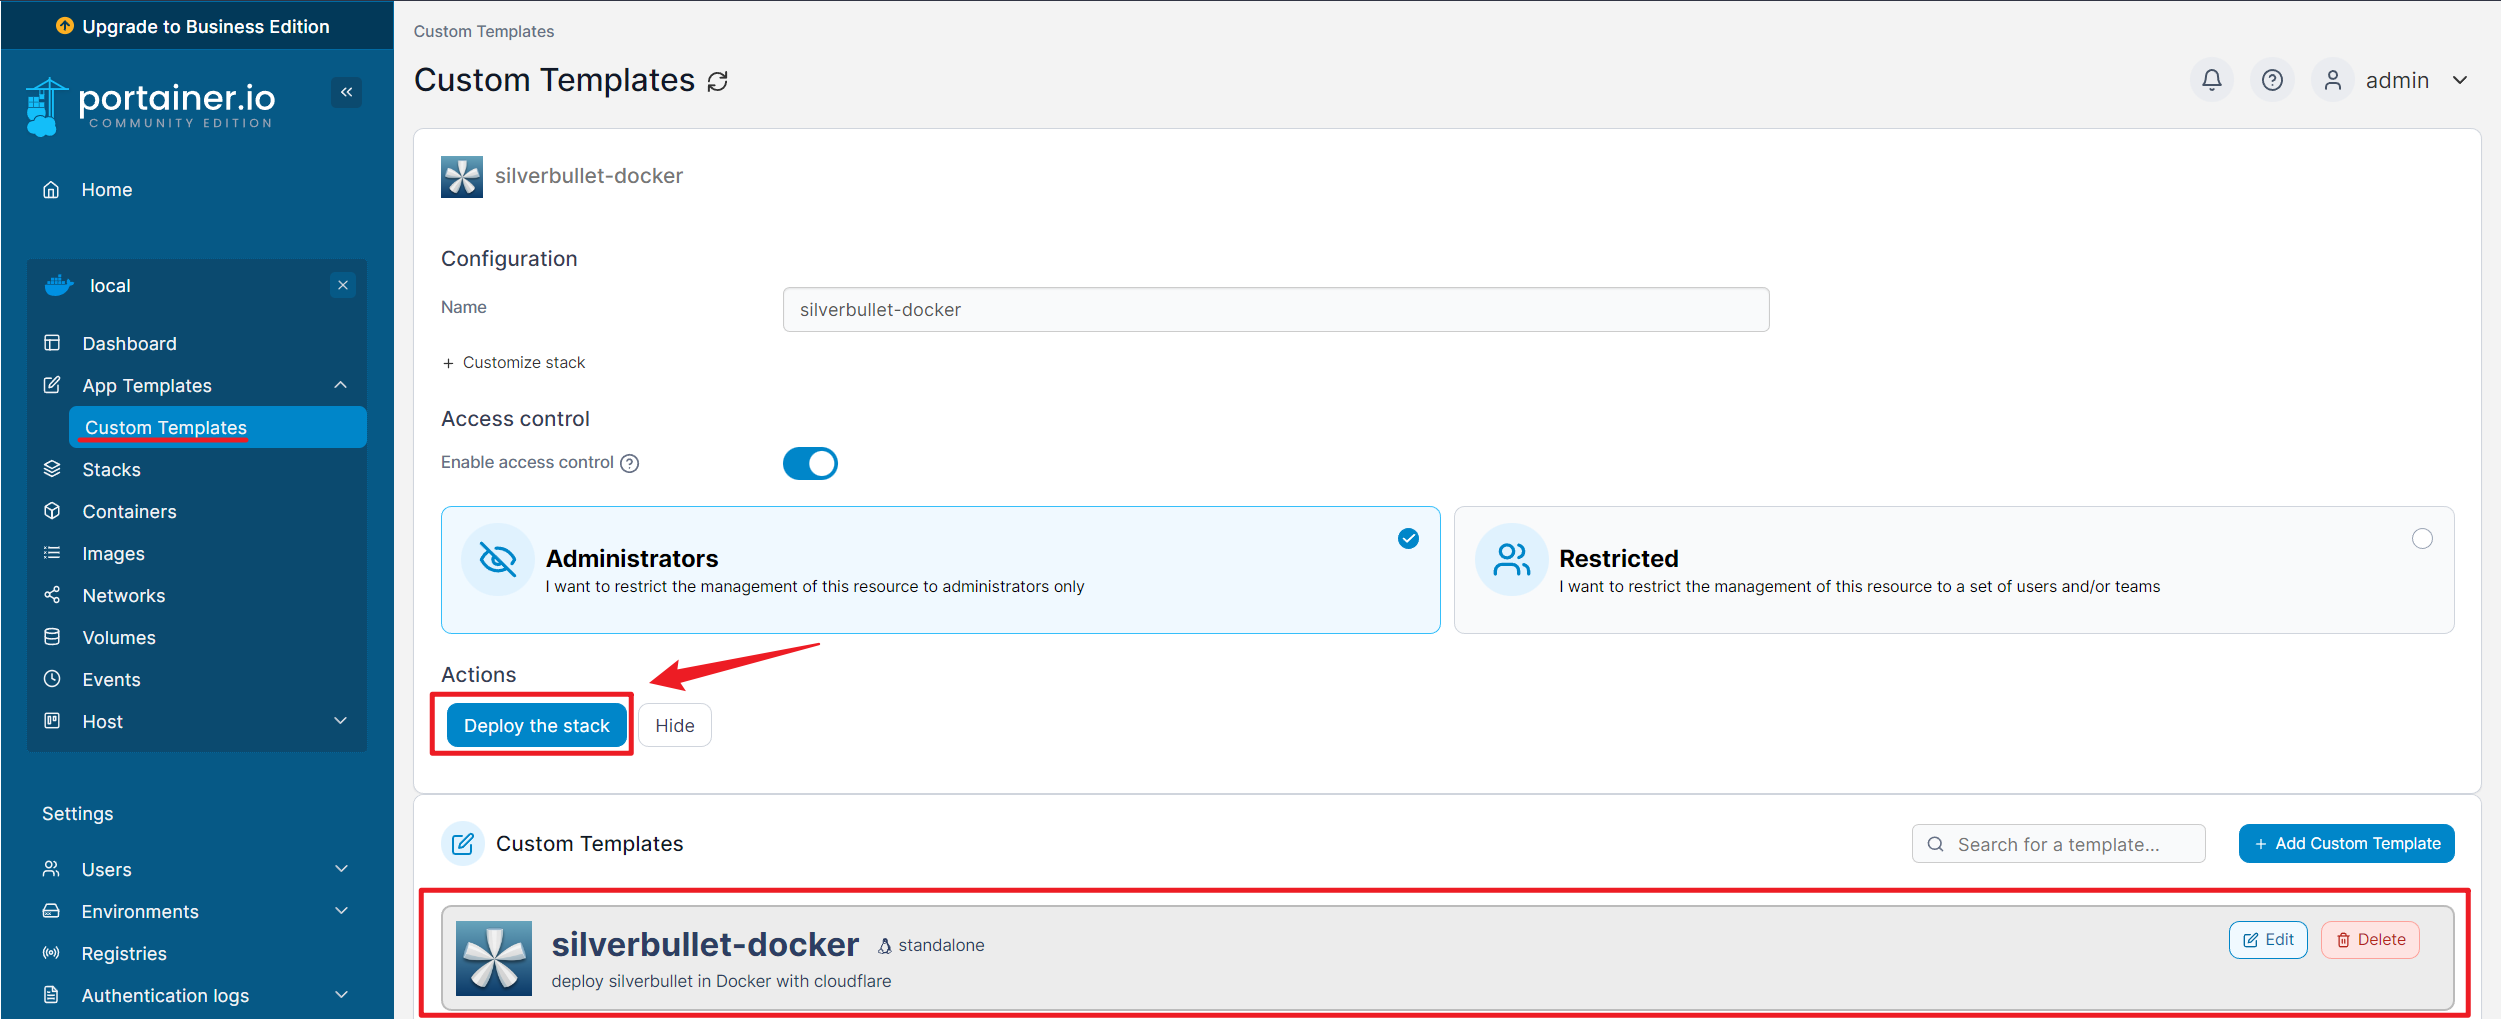
Give it a few seconds and you will get a notification that both containers are running. ![]()
Only the silverbullet container should be working properly by this point, as we haven’t finished with Cloudflare yet.
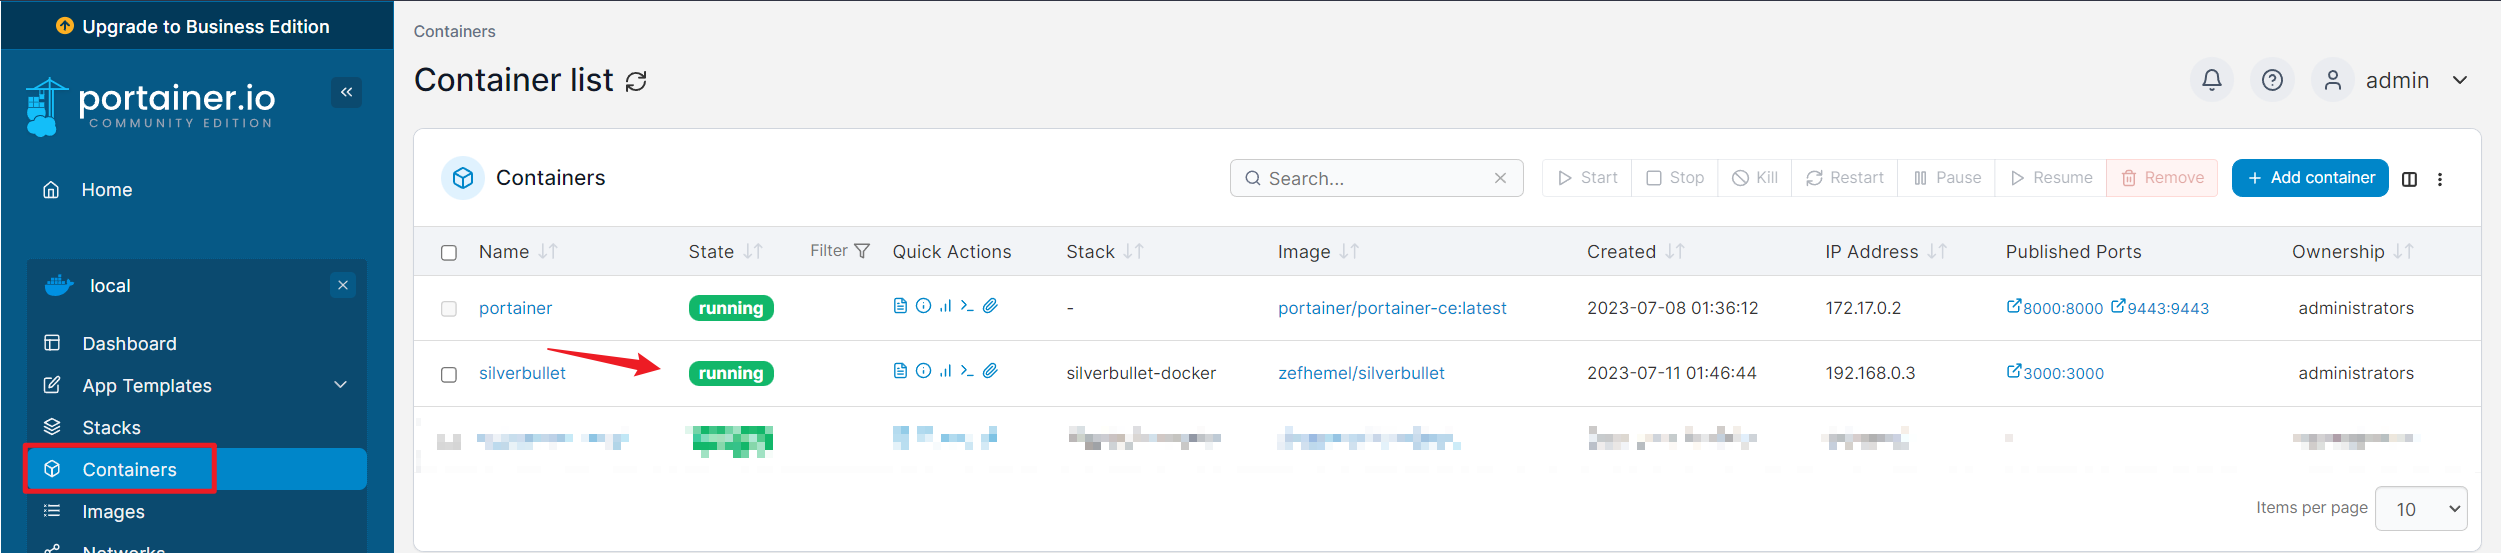
Verification
In a web browser in your local network (if your server is in your LAN) write the IP address of your server and add the port 3000 at the end, like this:
http://your-ip-address:3000
Right now the connection to silverbullet is HTTP and PWA(Progressive Web Apps) and offline mode will not work yet. Don’t worry we will get into that later, but for now, it should be working correctly. Try to type something and sync it to your server.
2 - Set up Cloudflare with Tunnels.
Now we are going to use Cloudflare to be able to connect to SilverBullet from outside our network and have a valid SSL certificate without opening any ports or needing a static IPv4 address from our ISP or changing our router configuration.
You will need three things:
- An account with Cloudflare
 .
. - A debit/credit card
 .
. - A domain name (you can buy it on Njalla
 . Your real name will not be shown if someone uses whois tools).
We assume you’ve already signed up to Cloudflare, if not you can go and do it now. It’s free but you’ll need to add a real debit/credit card to have access to the tunnels and zero access. If you don’t want to do that, you can use alternatives like Caddy or Nginx for reverse proxy and Authelia or you can use the basic authentication built-in for authentication.
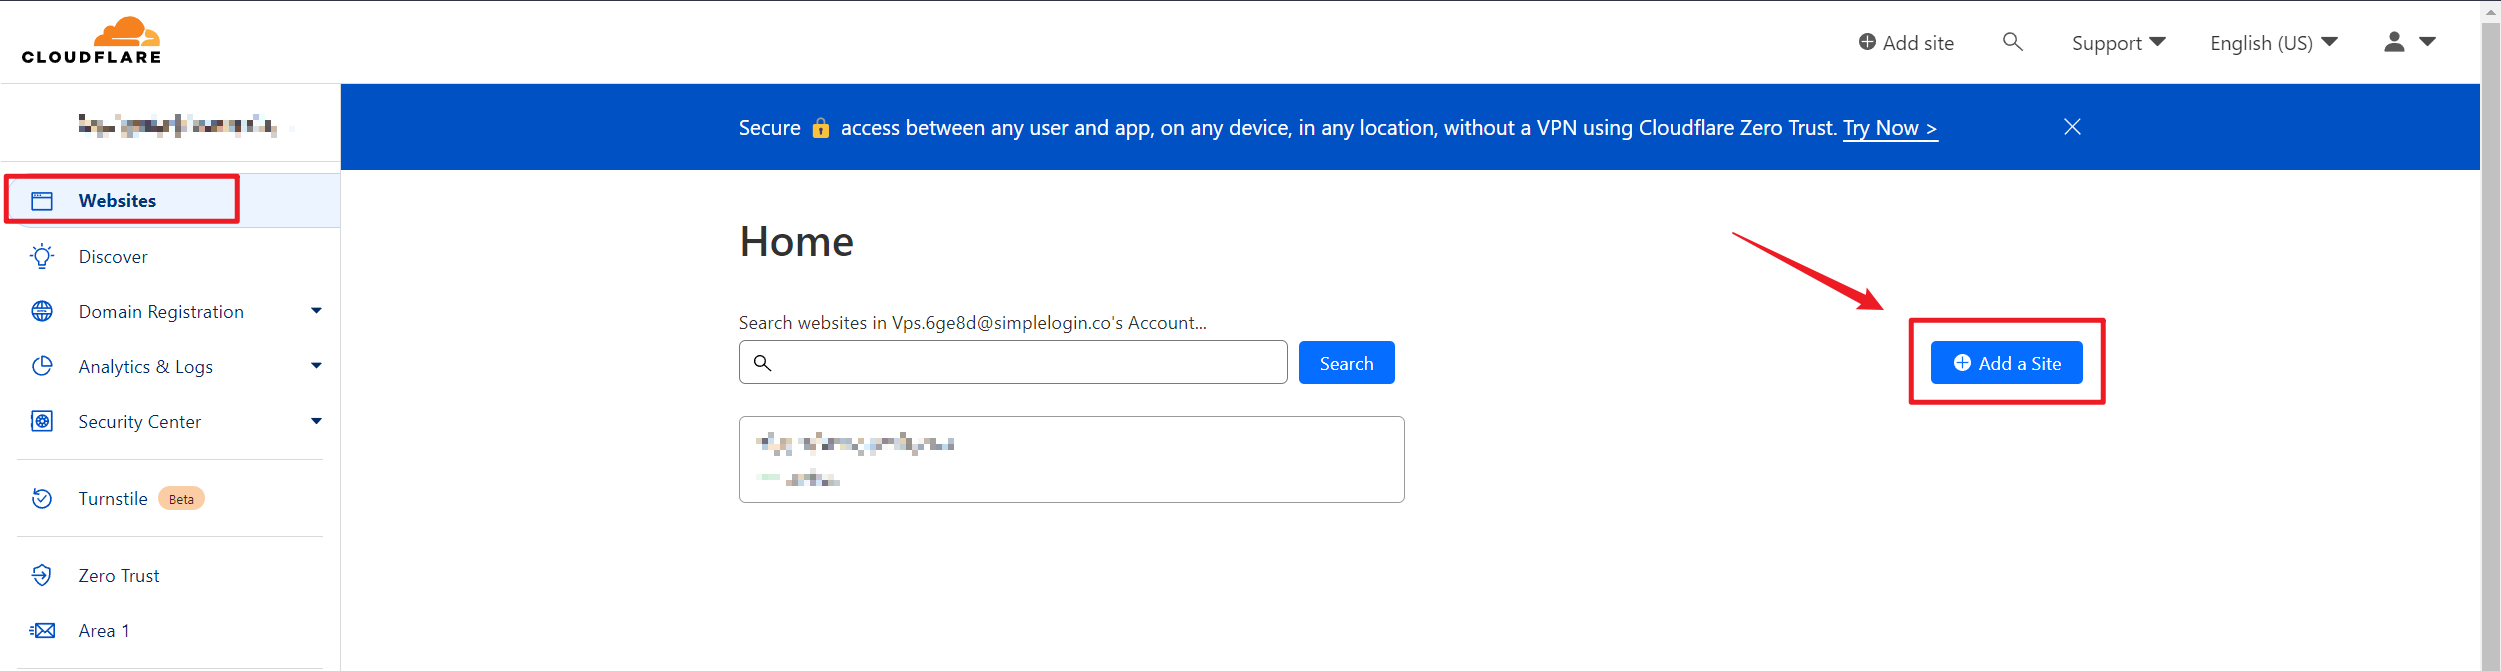
Add your Site/Domain Name to Cloudflare
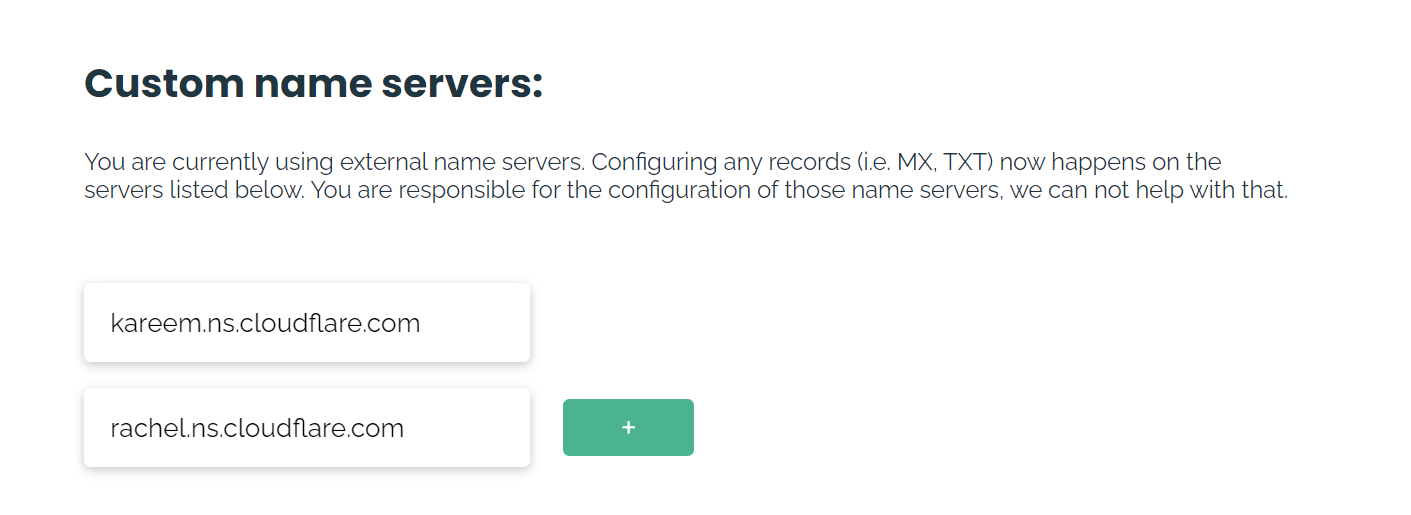
Follow the official docs of Cloudflare on how to add a site, it’s really easy, just remember to change the name servers (DNS) to the ones suggested by Cloudflare in the website where you bought your domain name.
Like this (This is Njalla config panel)
Setup Tunnel
Without opening any ports or touching the firewall, we set up this tunnel to connect it to our server.
Click on Zero Trust once you have added your site/domain name.

Click on Create Tunnel.
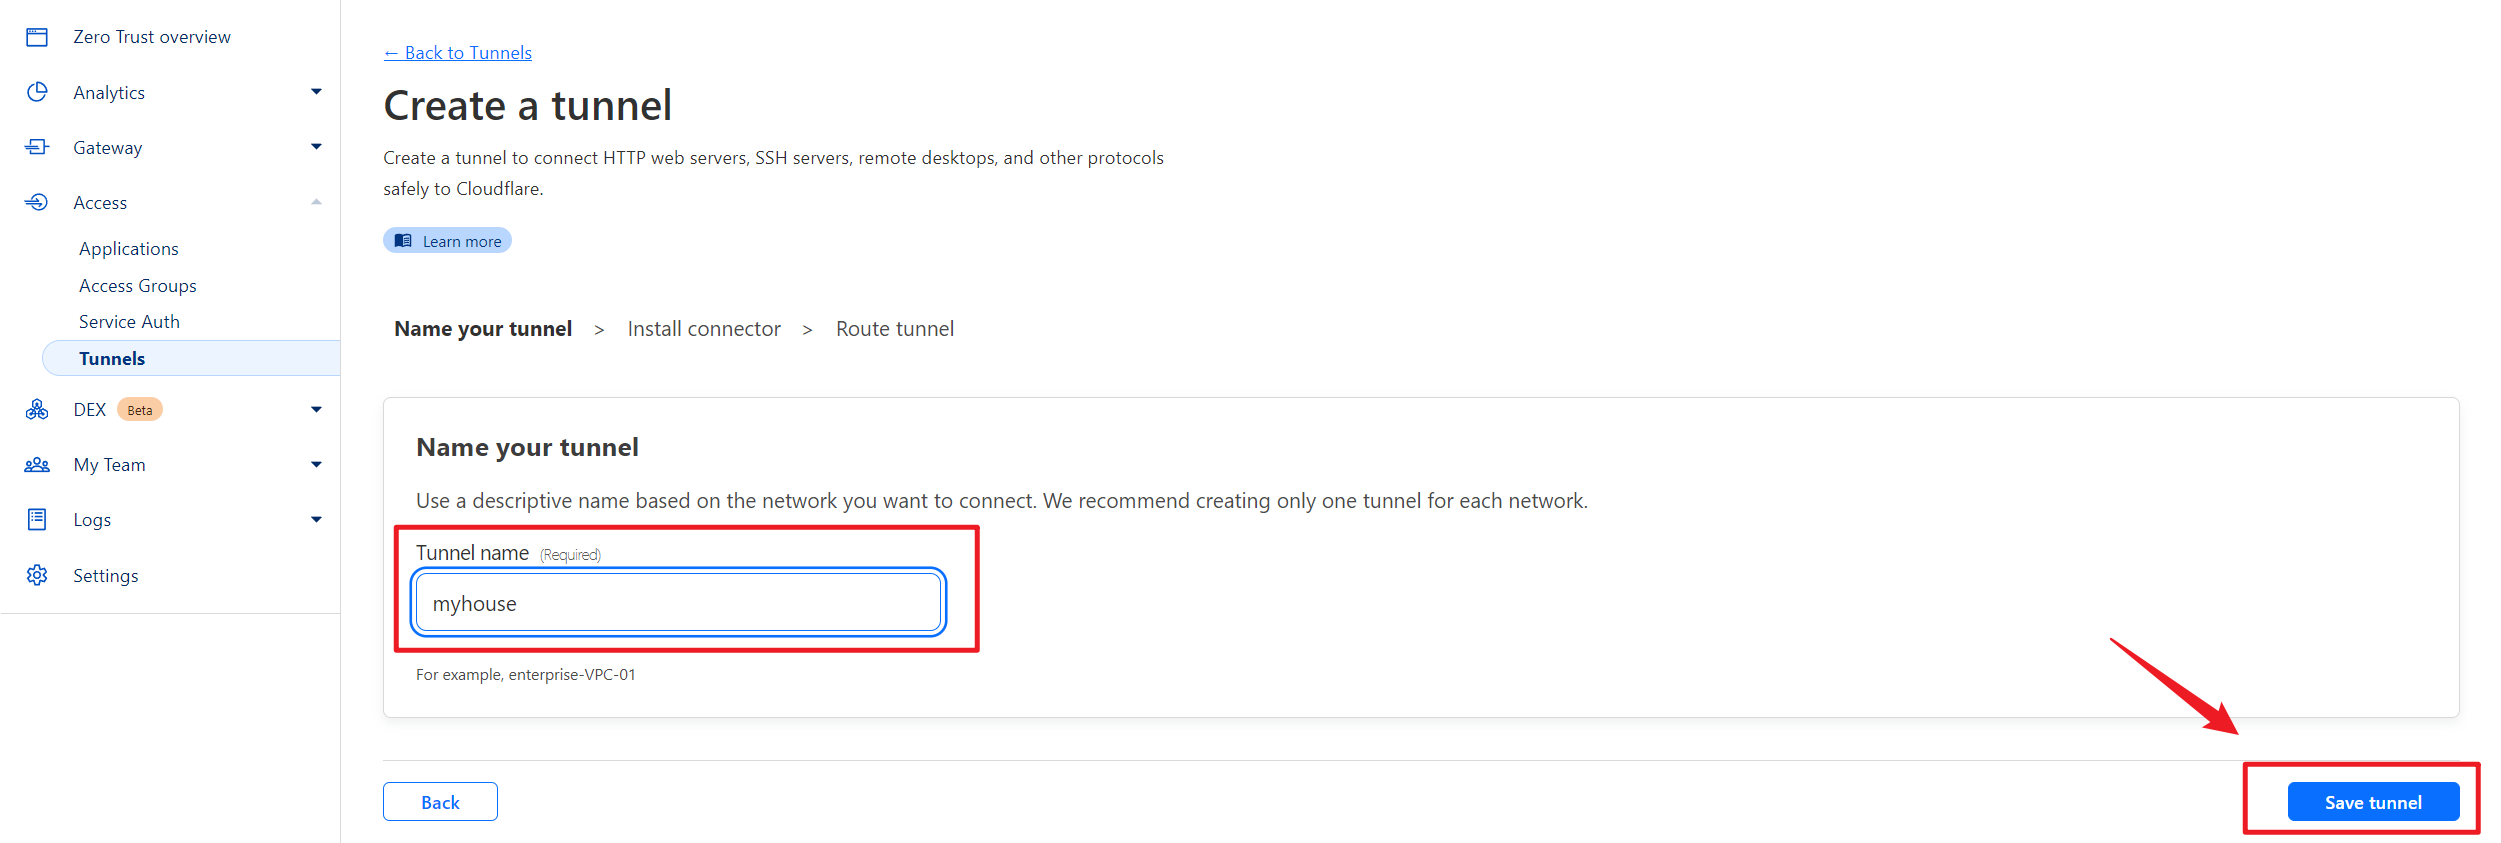
Choose a name for your tunnel, I chose “myhome”, very imaginative again ![]() . And then click on Save Tunnel.
. And then click on Save Tunnel.
Since we have already set up a container of Cloudflare, just copy the token you are given. And be careful, if someone gets your token they will be able to make a tunnel connection to your server.
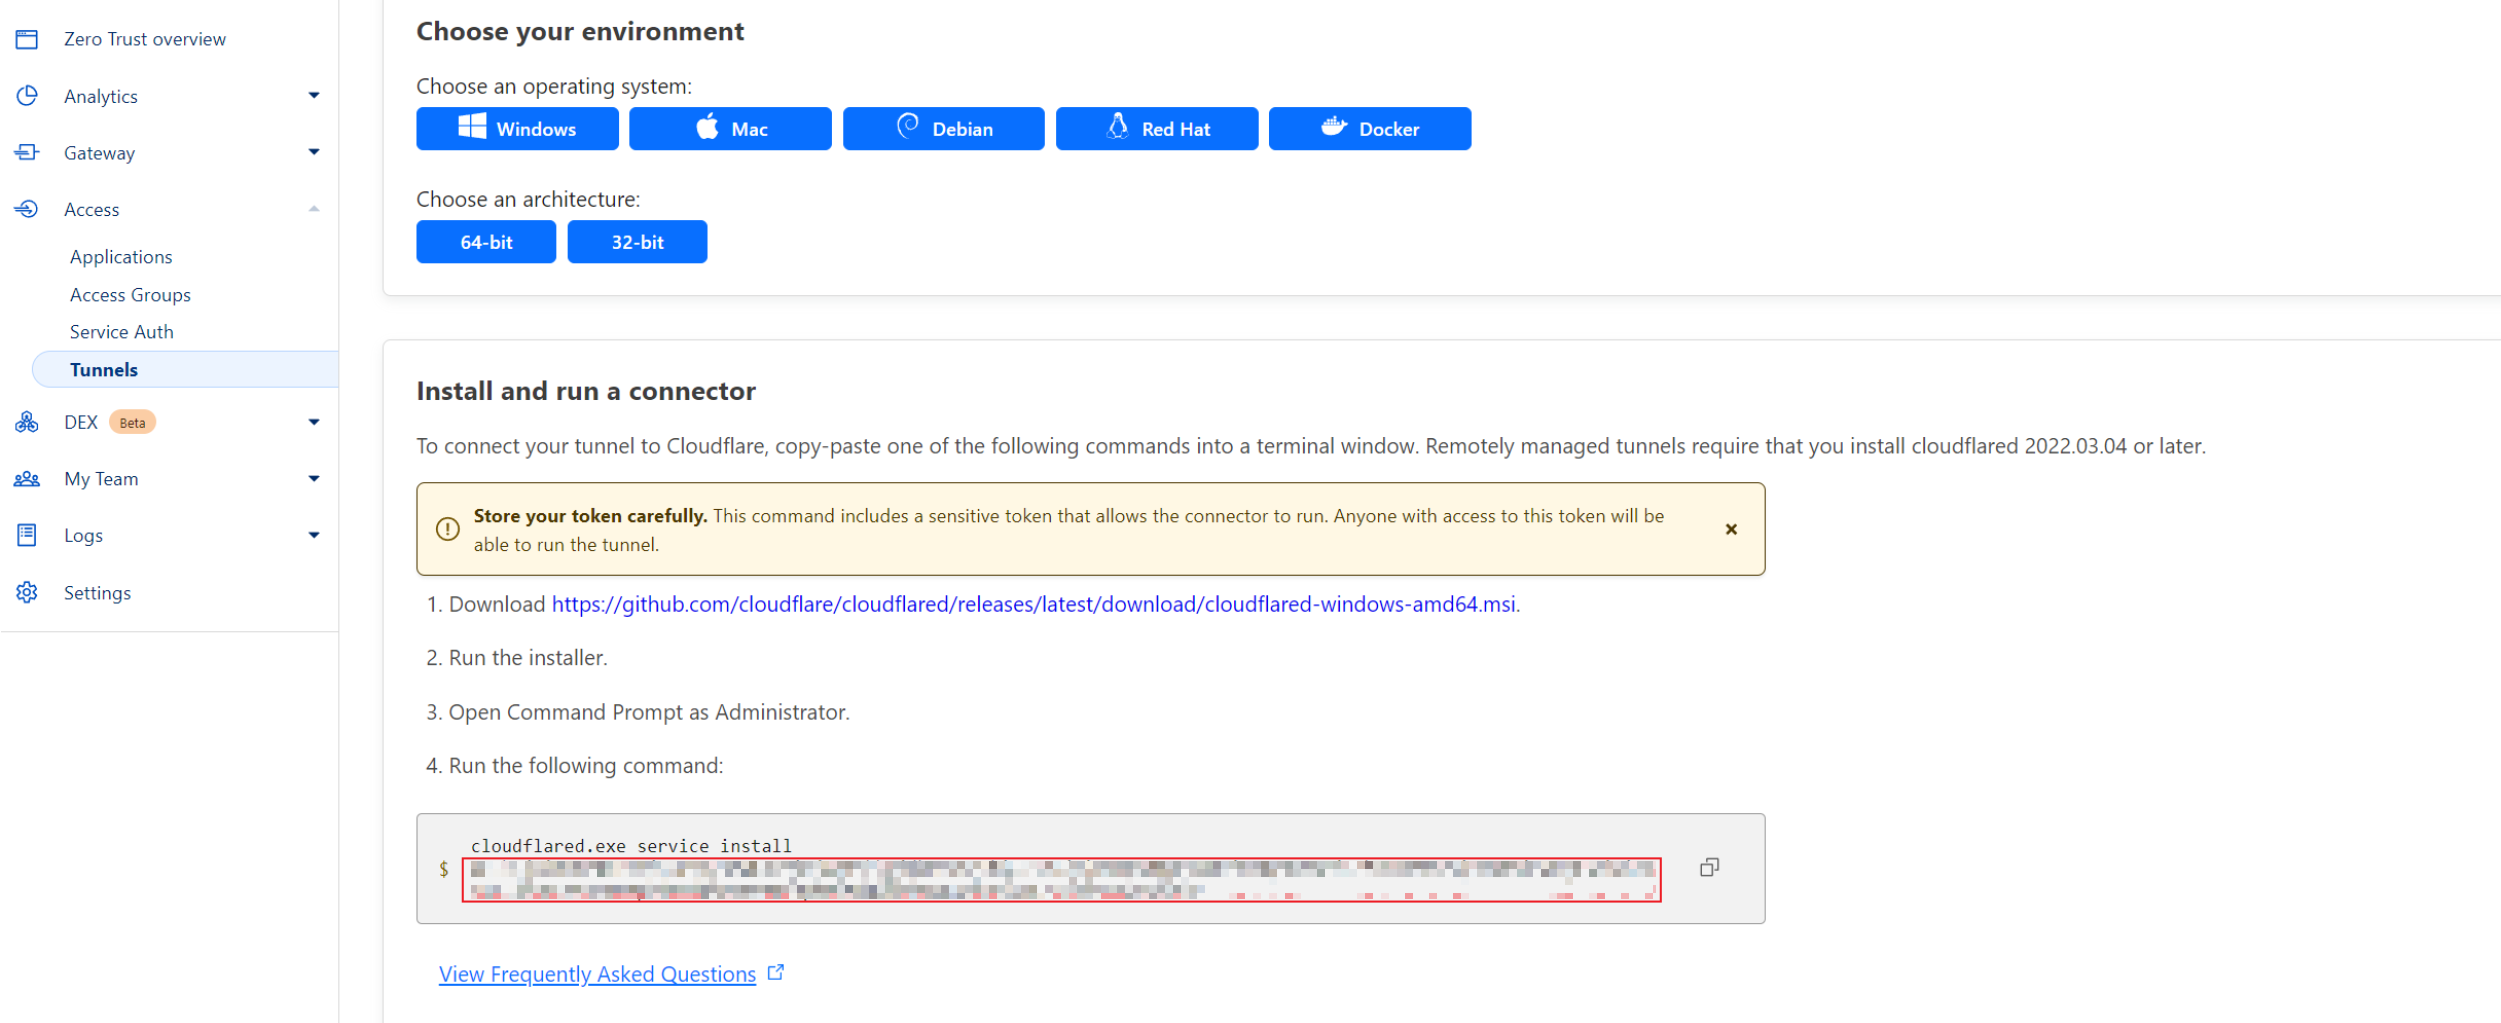
Now that you have the token value of your tunnel, it’s time to configure the cloudflare container in Portainer. Let’s go there.
Go to App Templates > Custom Templates > Edit.
Replace “your-token-value-here!” with your token value.
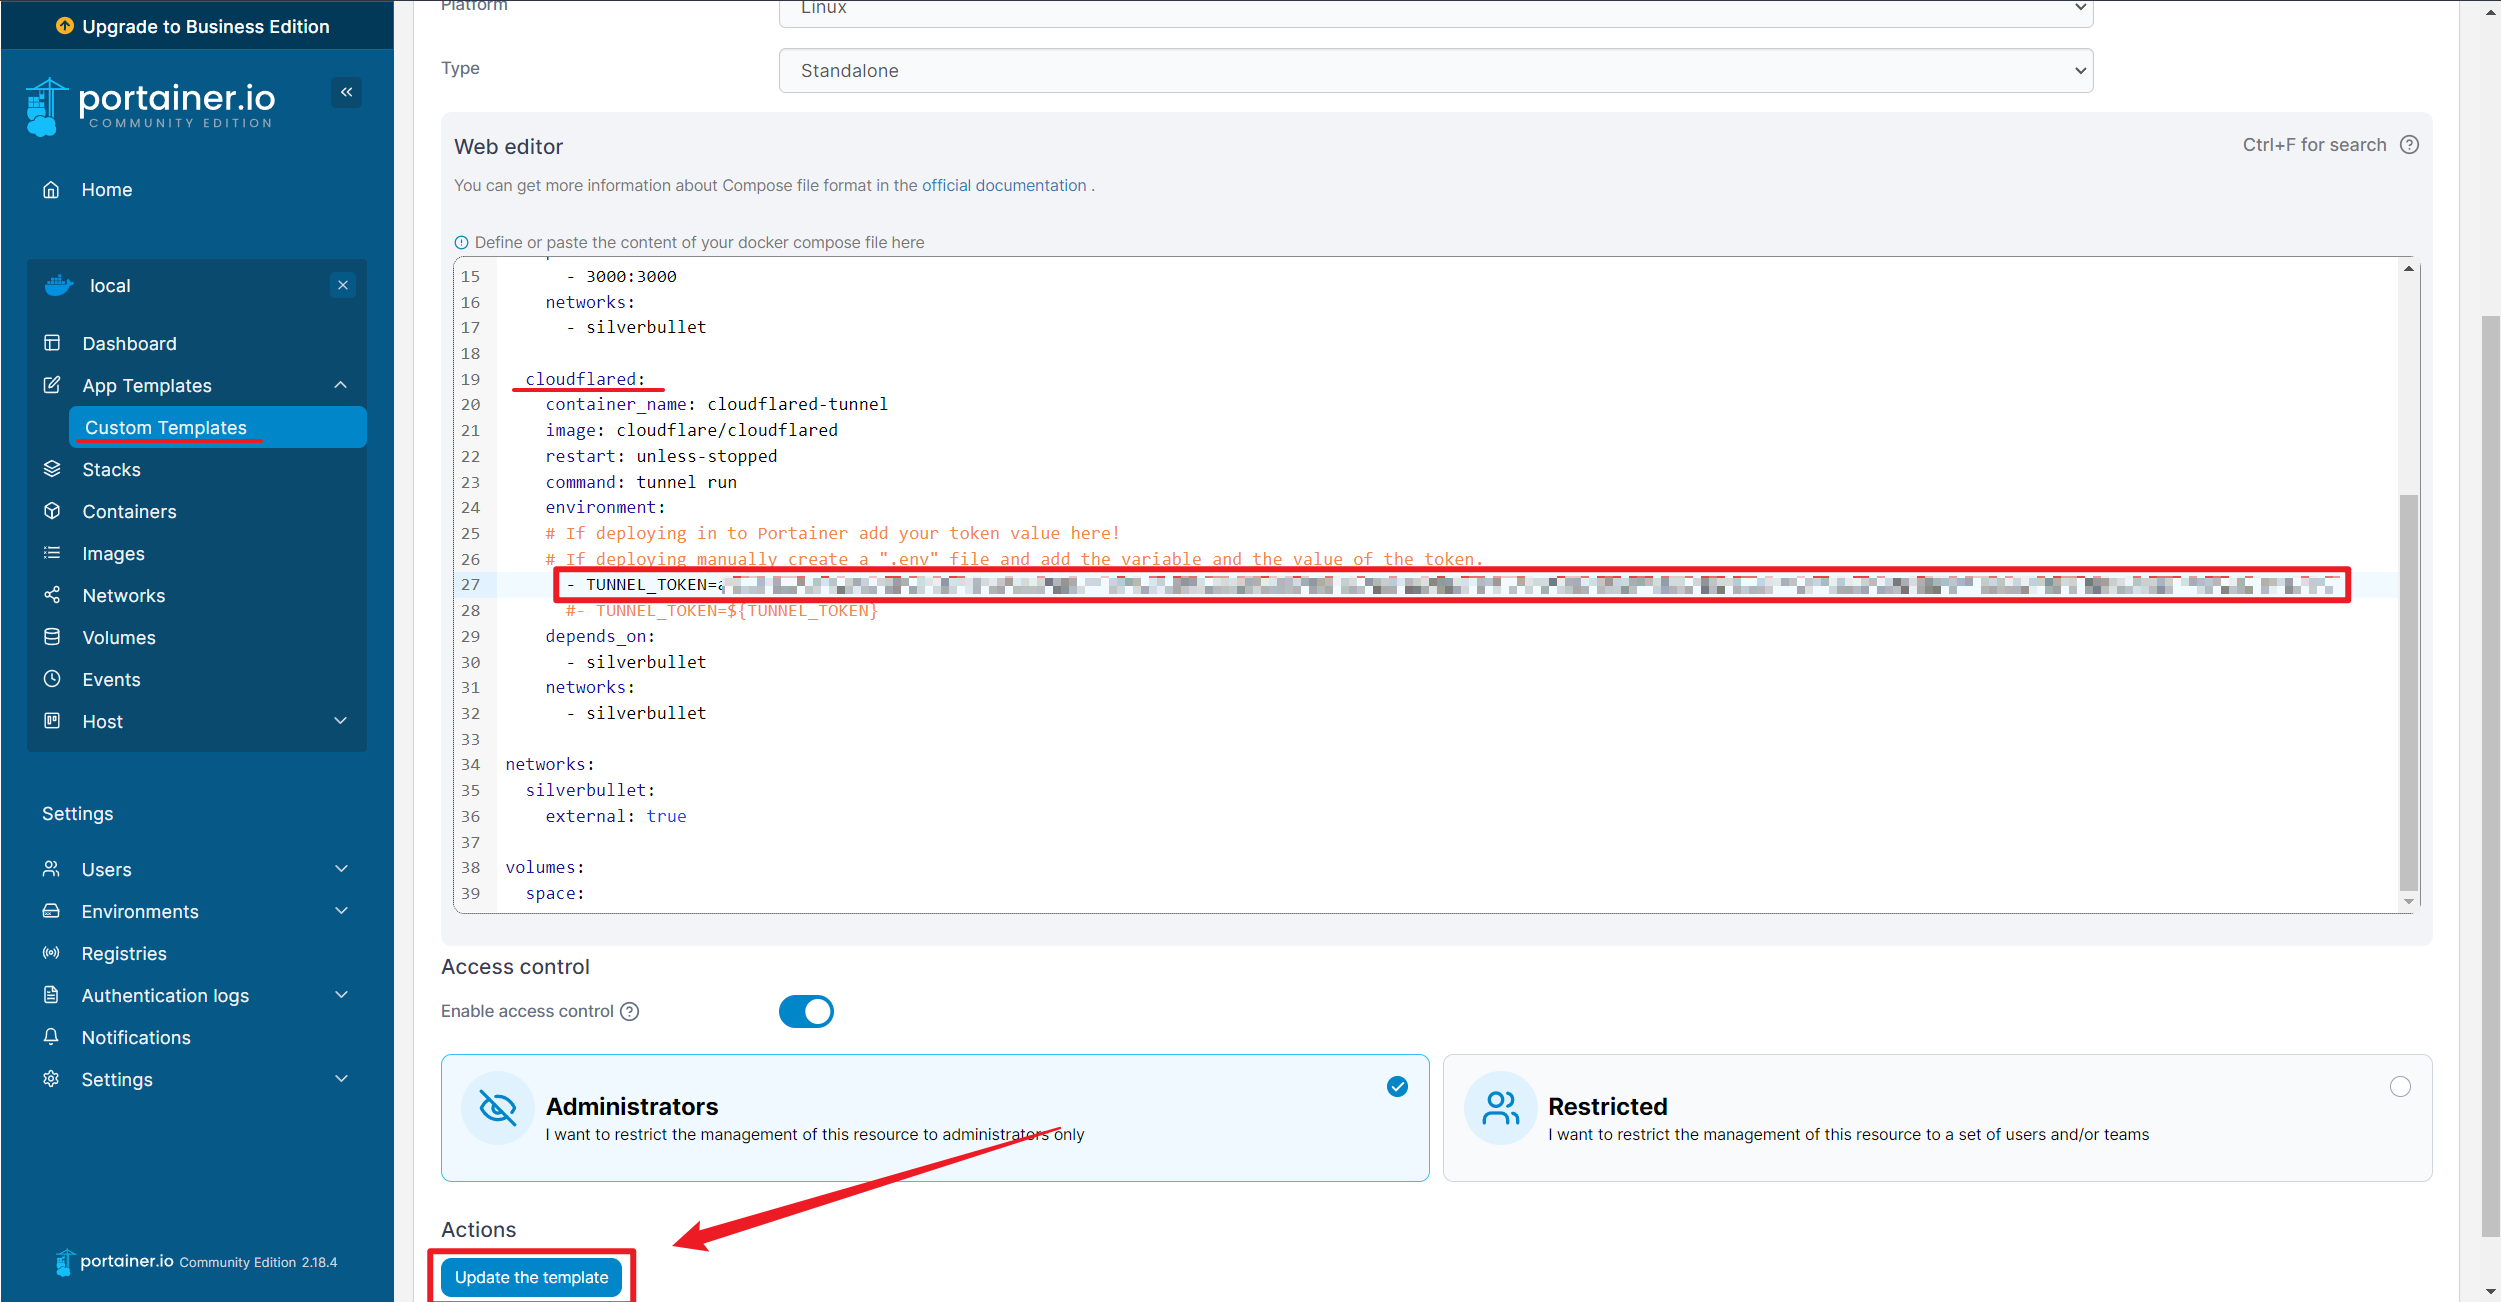
Click on Update the template.****
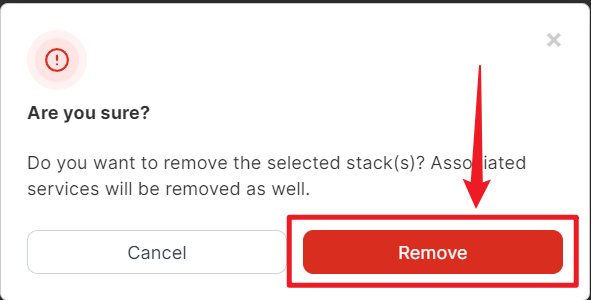
Next, go to Stacks and click on the stack “silverbullet-docker”, or the name of your choice, then click Remove.

Click Remove to confirm. Don’t worry, this will only remove the stack and the containers attached to it, not the template.
Then go to App Templates.
Go into the silverbullet-docker and click on Edit.
Click Deploy Stack.
Come back to Cloudflare and in the Connectors section you will see that a connection has been made to your server. Click Next.

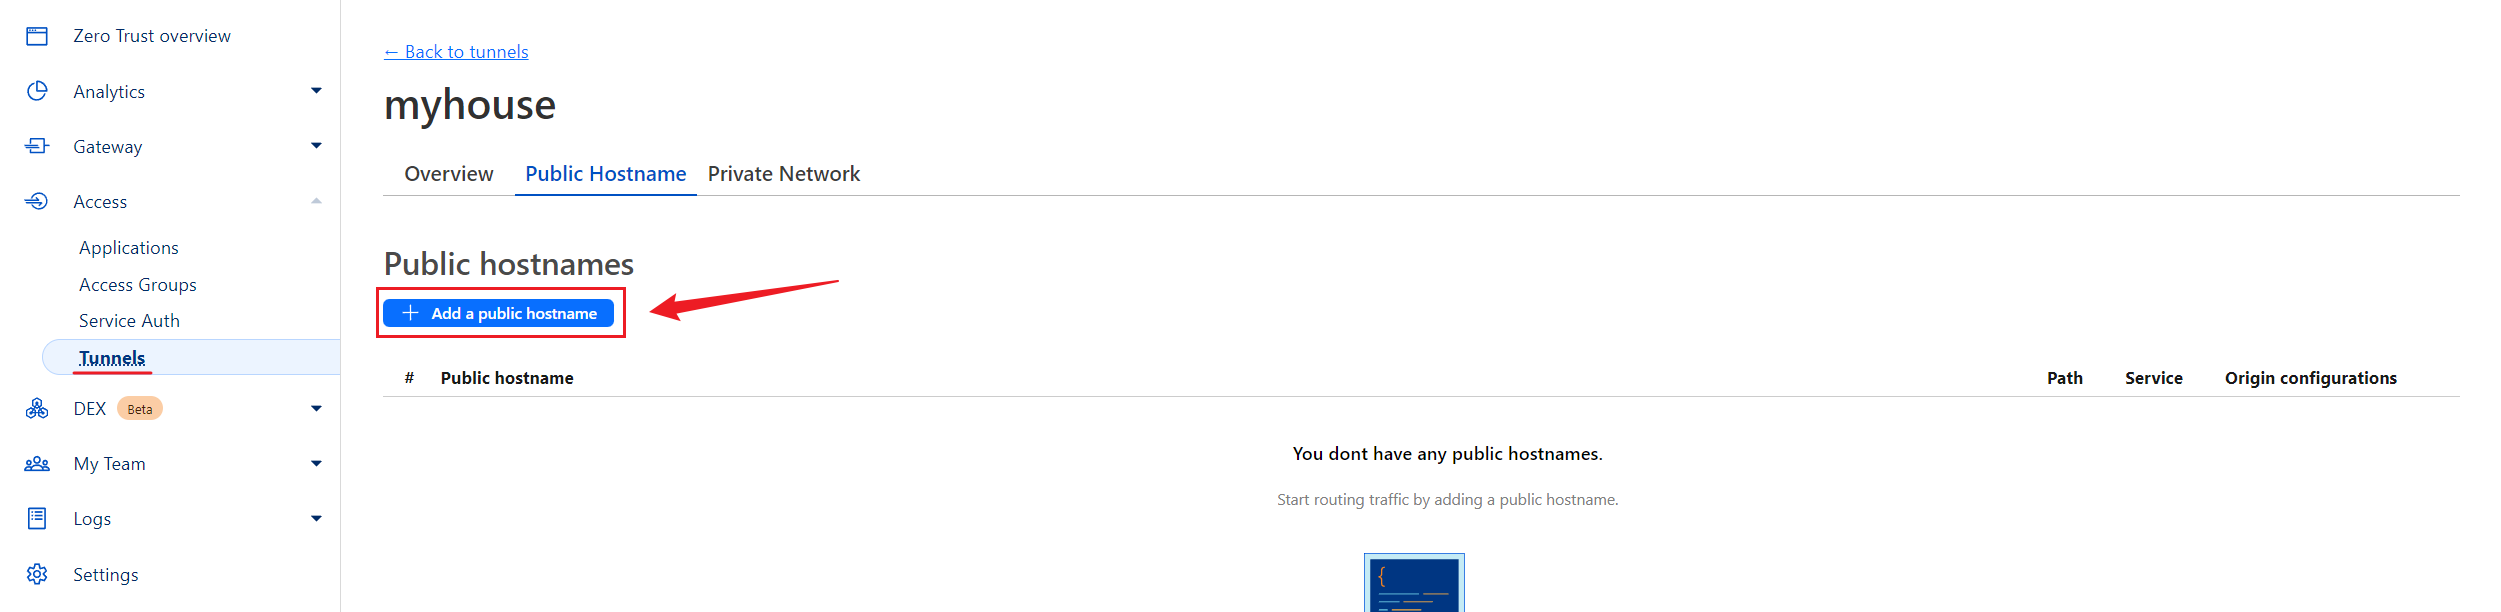
Click Add a public hostname.
Fill in the subdomain field with the name you want to use to access silverbullet. Choose your domain name and for Type choose HTTP and the URL should be silverbullet:3000.
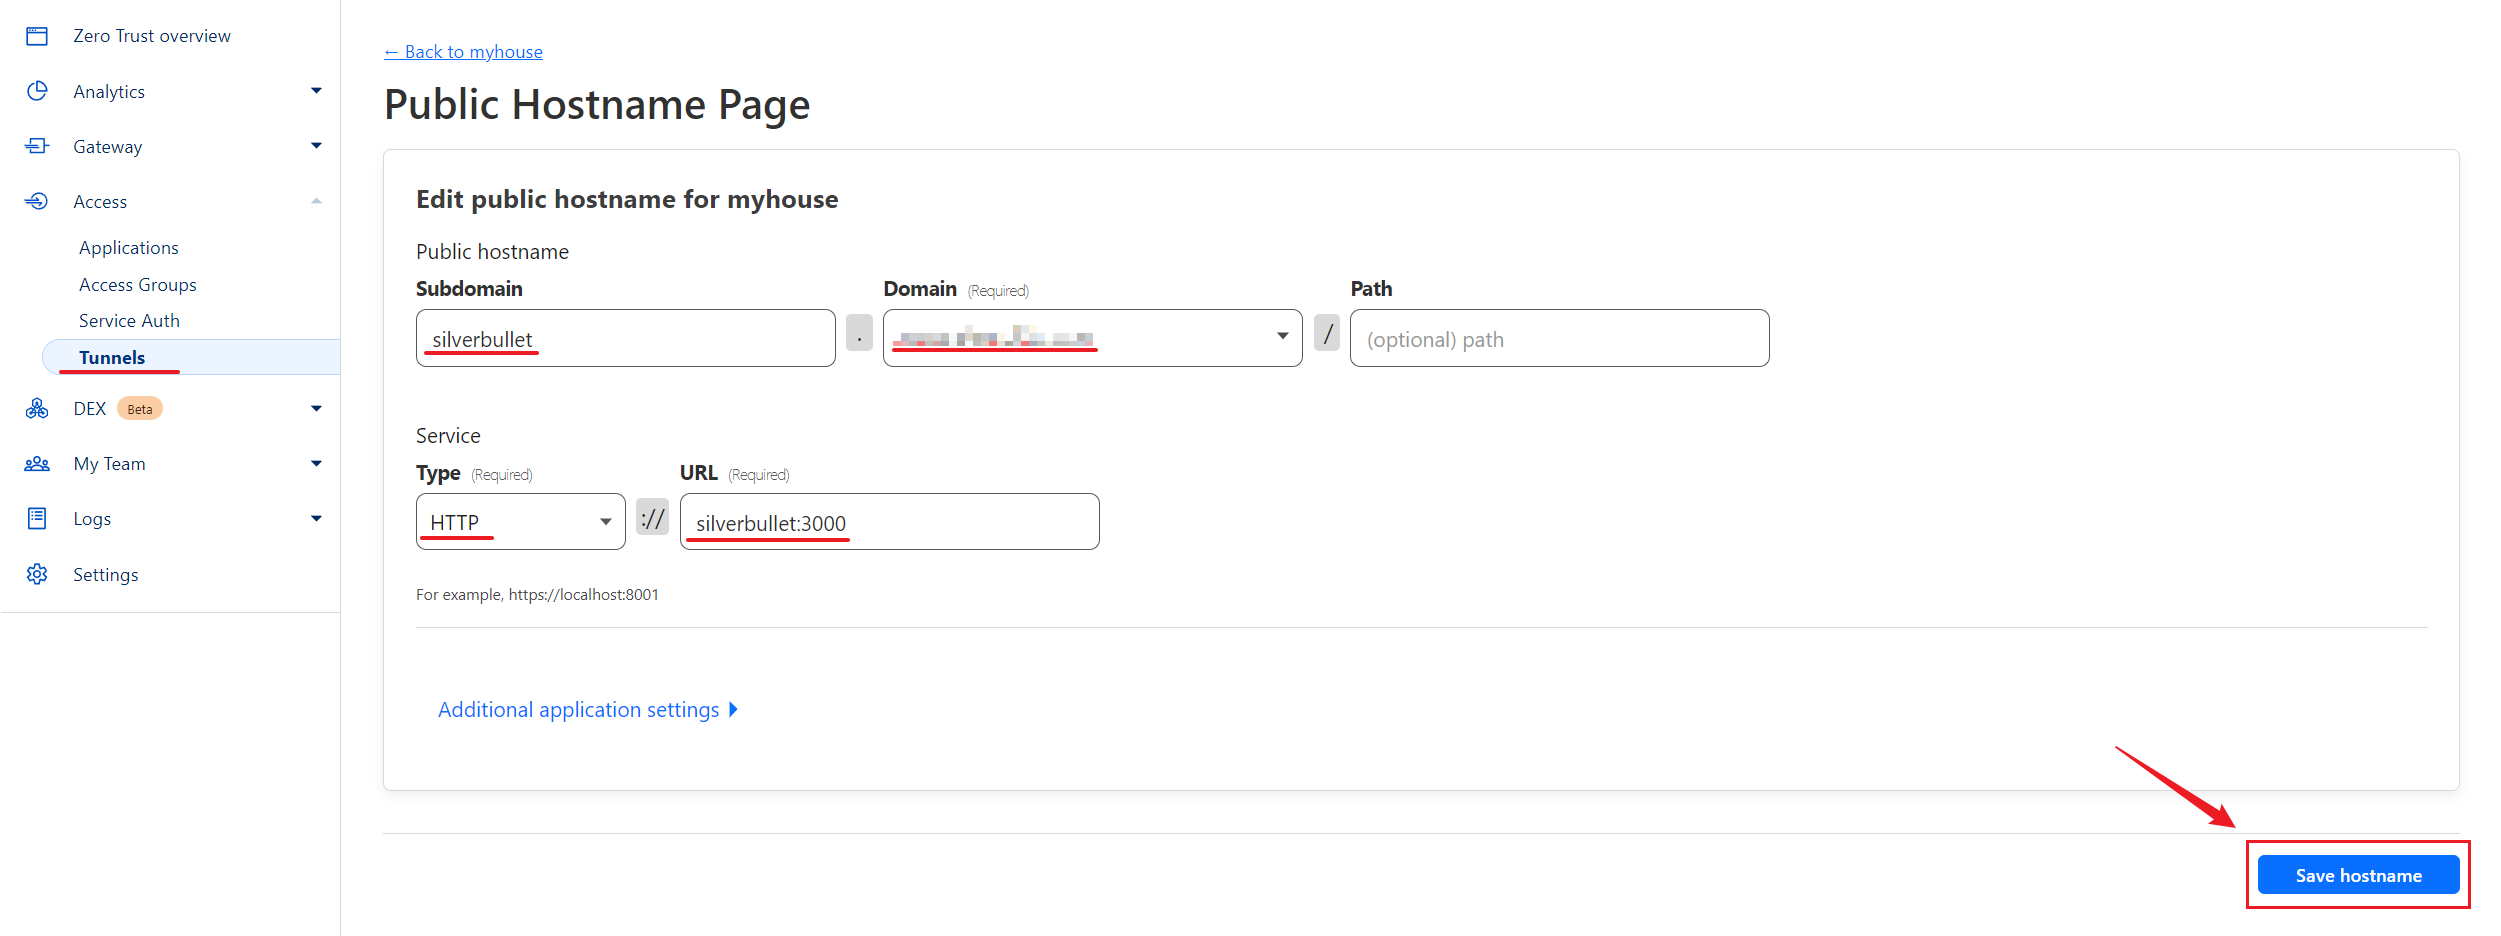
Check now with silberbullet.your-domain-name.com. You should be able to access it.
3 - Set up Cloudflare Zero Access Trust (Auth).
We assume you’ve already signed up to Cloudflare, if not you can go and do it now, it’s free but you’ll need to add a real debit/credit card to have access to the tunnels and zero access. If you don’t want to do that, you can use alternatives like Caddy or Nginx for reverse proxy and Authelia or you can use the BasicAuth build-in for authentication.
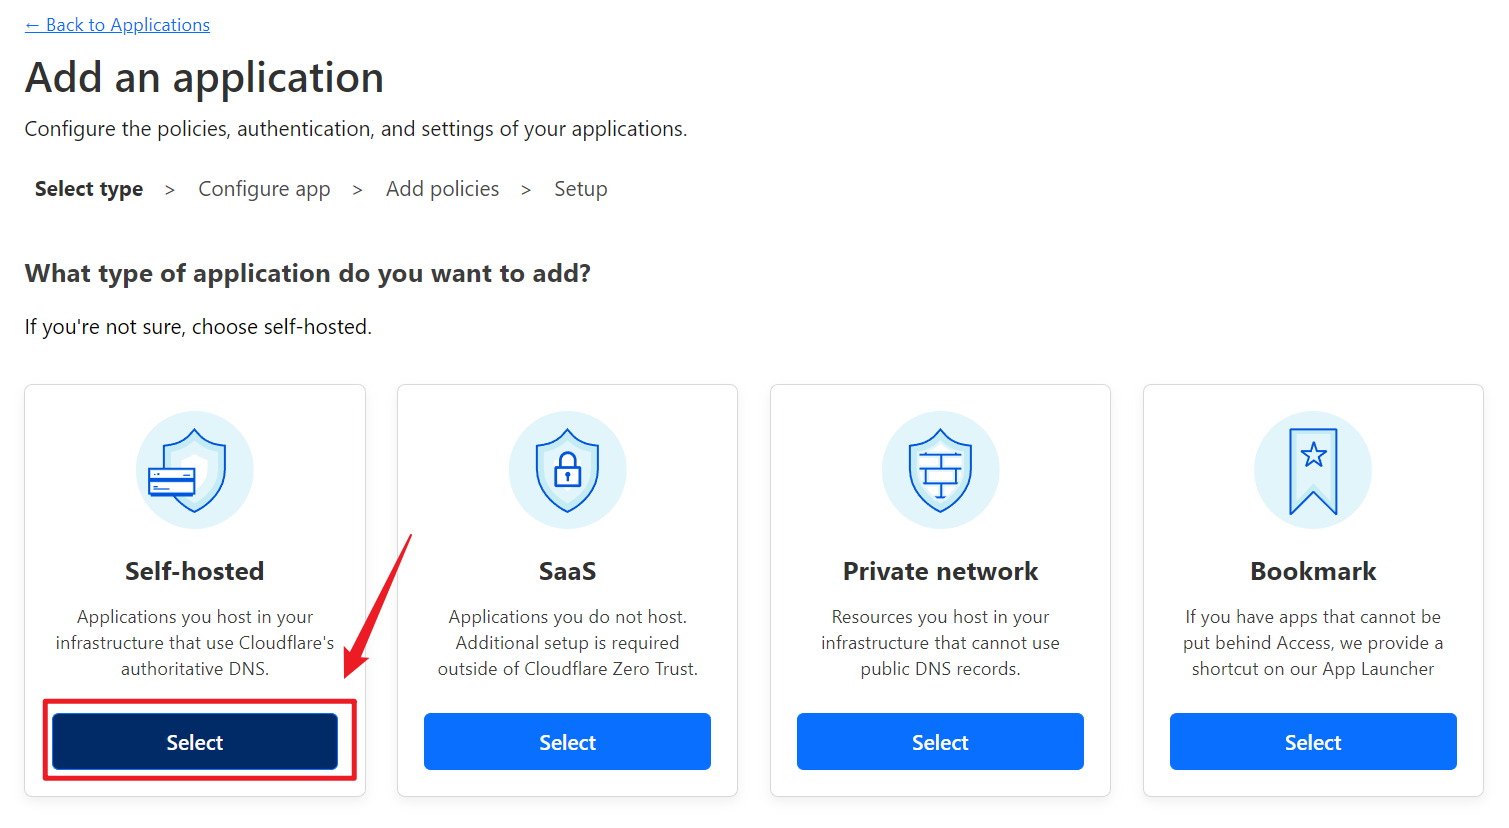
Go to Access > Applications and click Add an application from the Zero Trust panel.

Select Self-Hosted.
Choose a name for your application and use the same name for the subdomain you chose in the previous steps. In our case both are silverbullet.
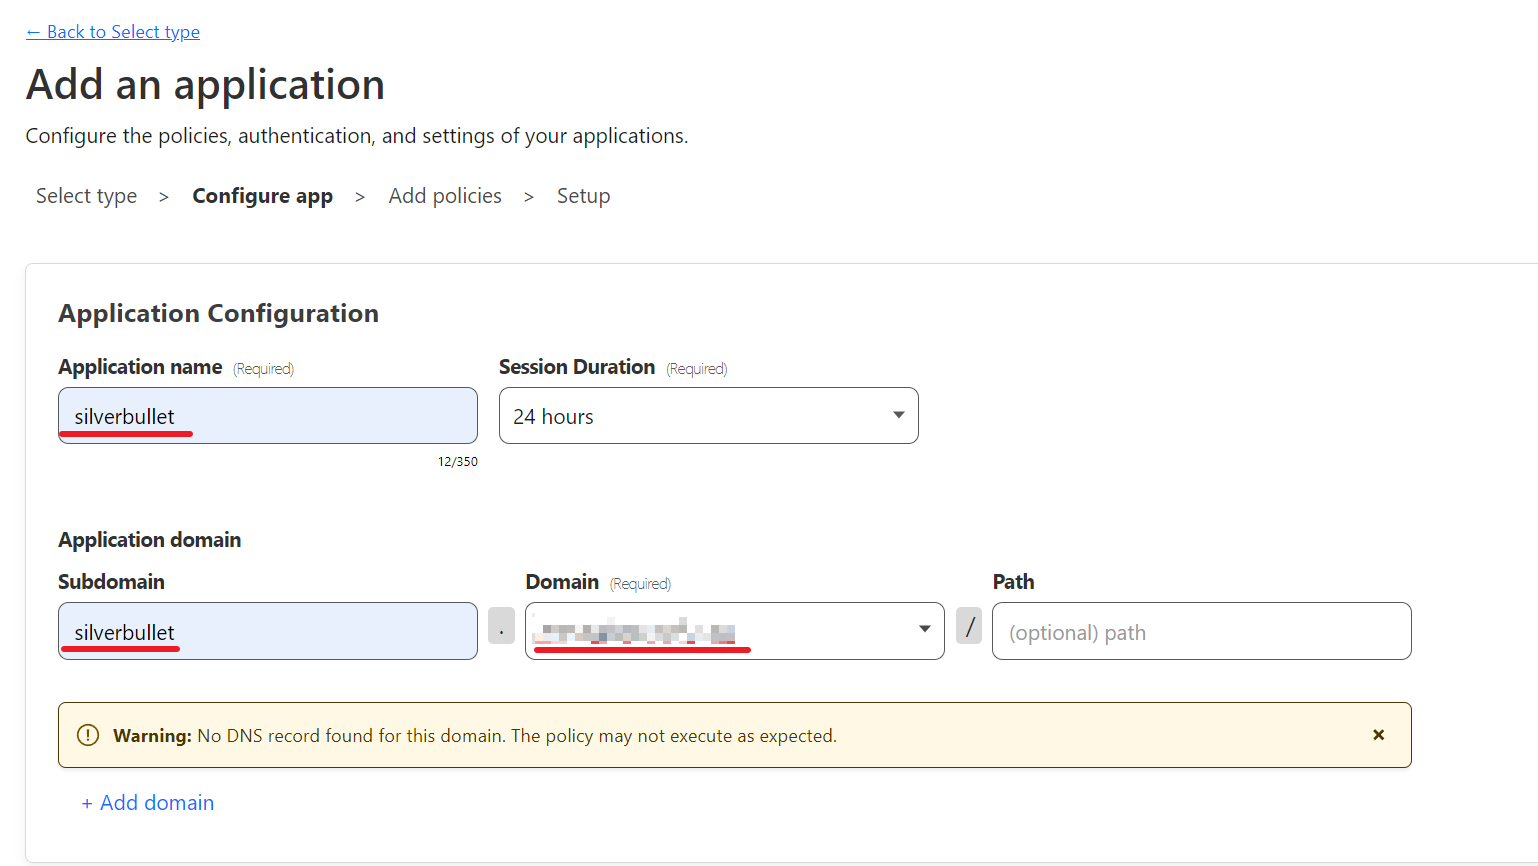
Leave the rest of the page as default and click Next at the bottom of the page.
Now it’s time to select the name of the policy, the action and the duration of the session.
Select a descriptive Name for future troubleshooting, select Allow for the Action and leave the session duration at its default.
In the Configure rules section, select Emails if you want to use emails (or you can use a range of IPs, specific countries…) for verification, and enter the emails you want to allow access to Silverbullet.
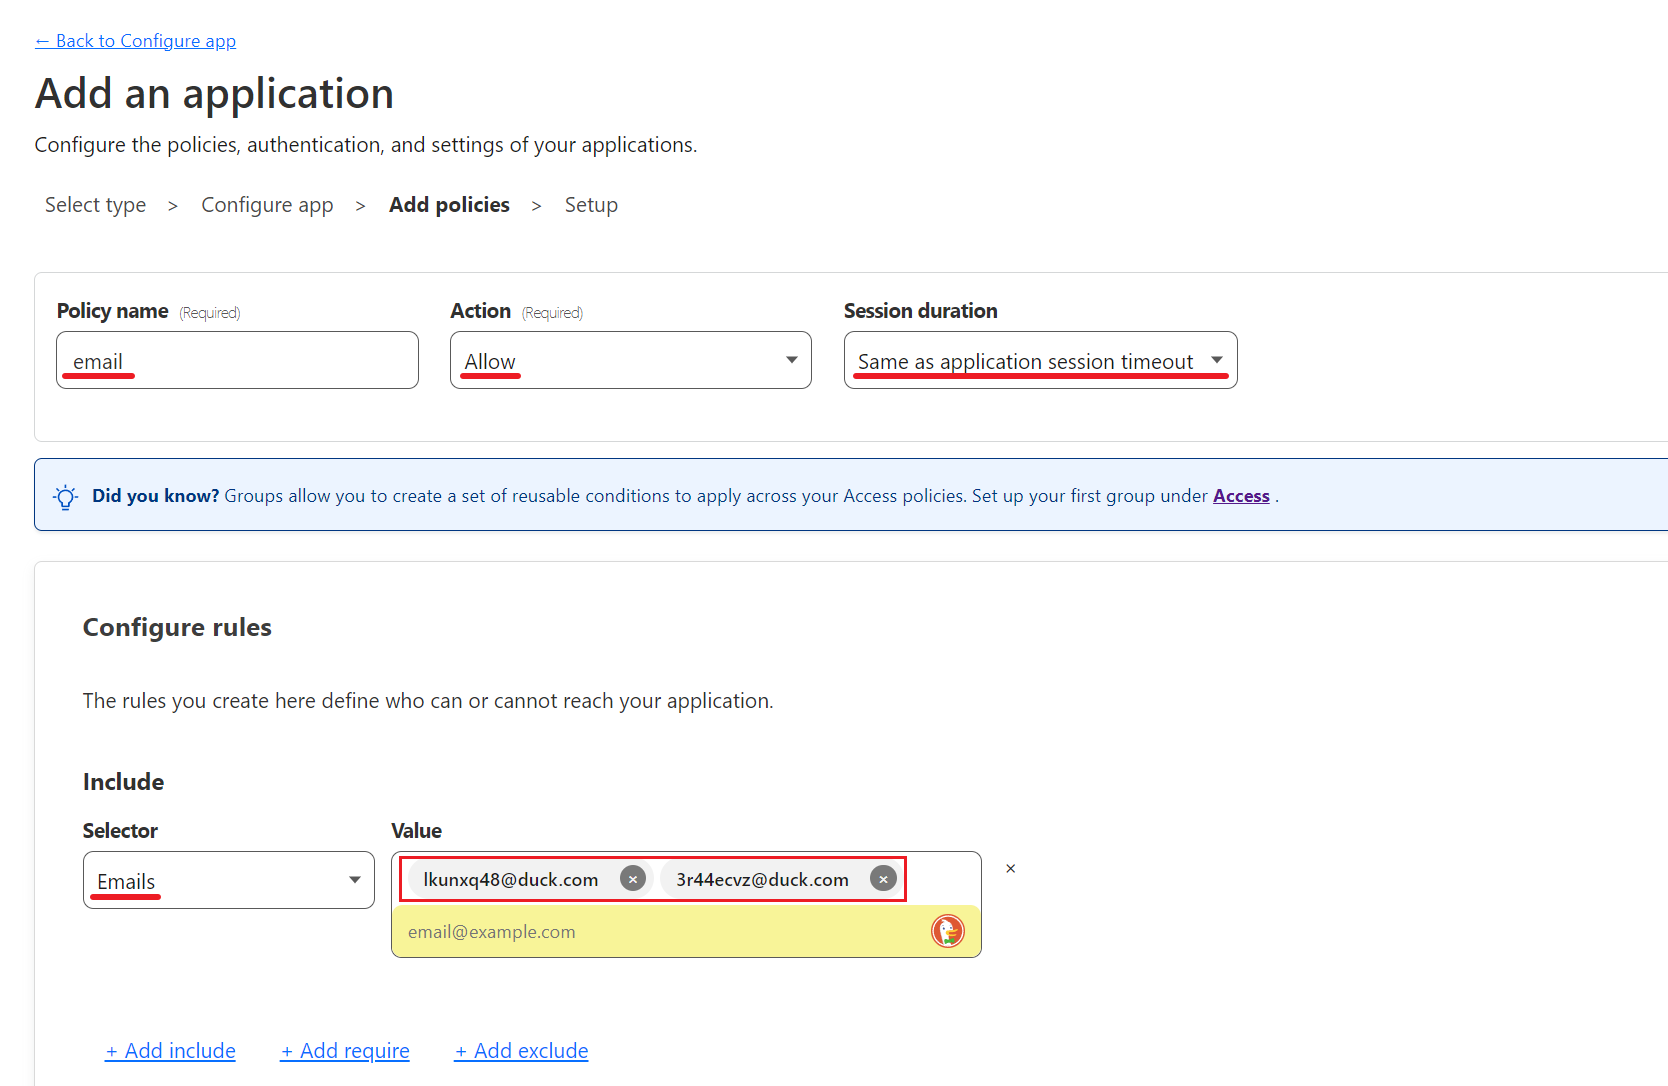
Leave the rest of the page as default and click Next at the bottom of the page.
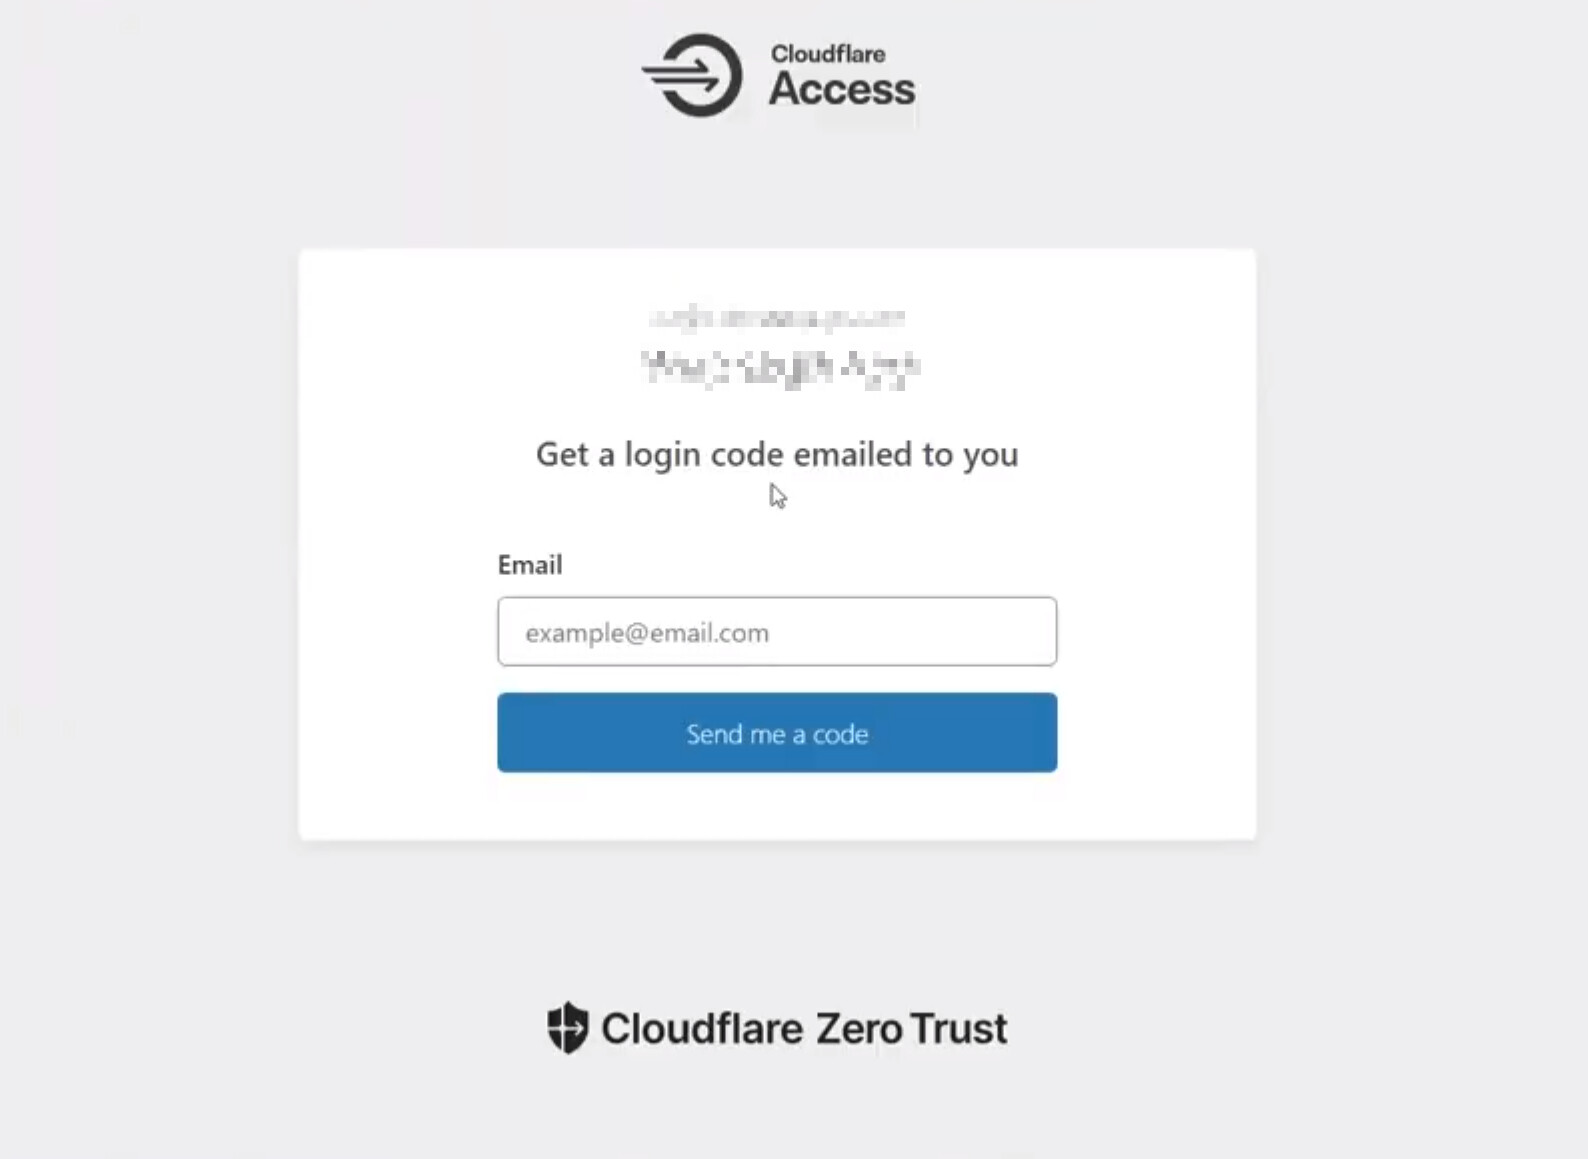
On the next page, leave everything as default and click on Add Application at the bottom of the page.
Go to silverbullet.your-domain-name.com and you should see a page like this:
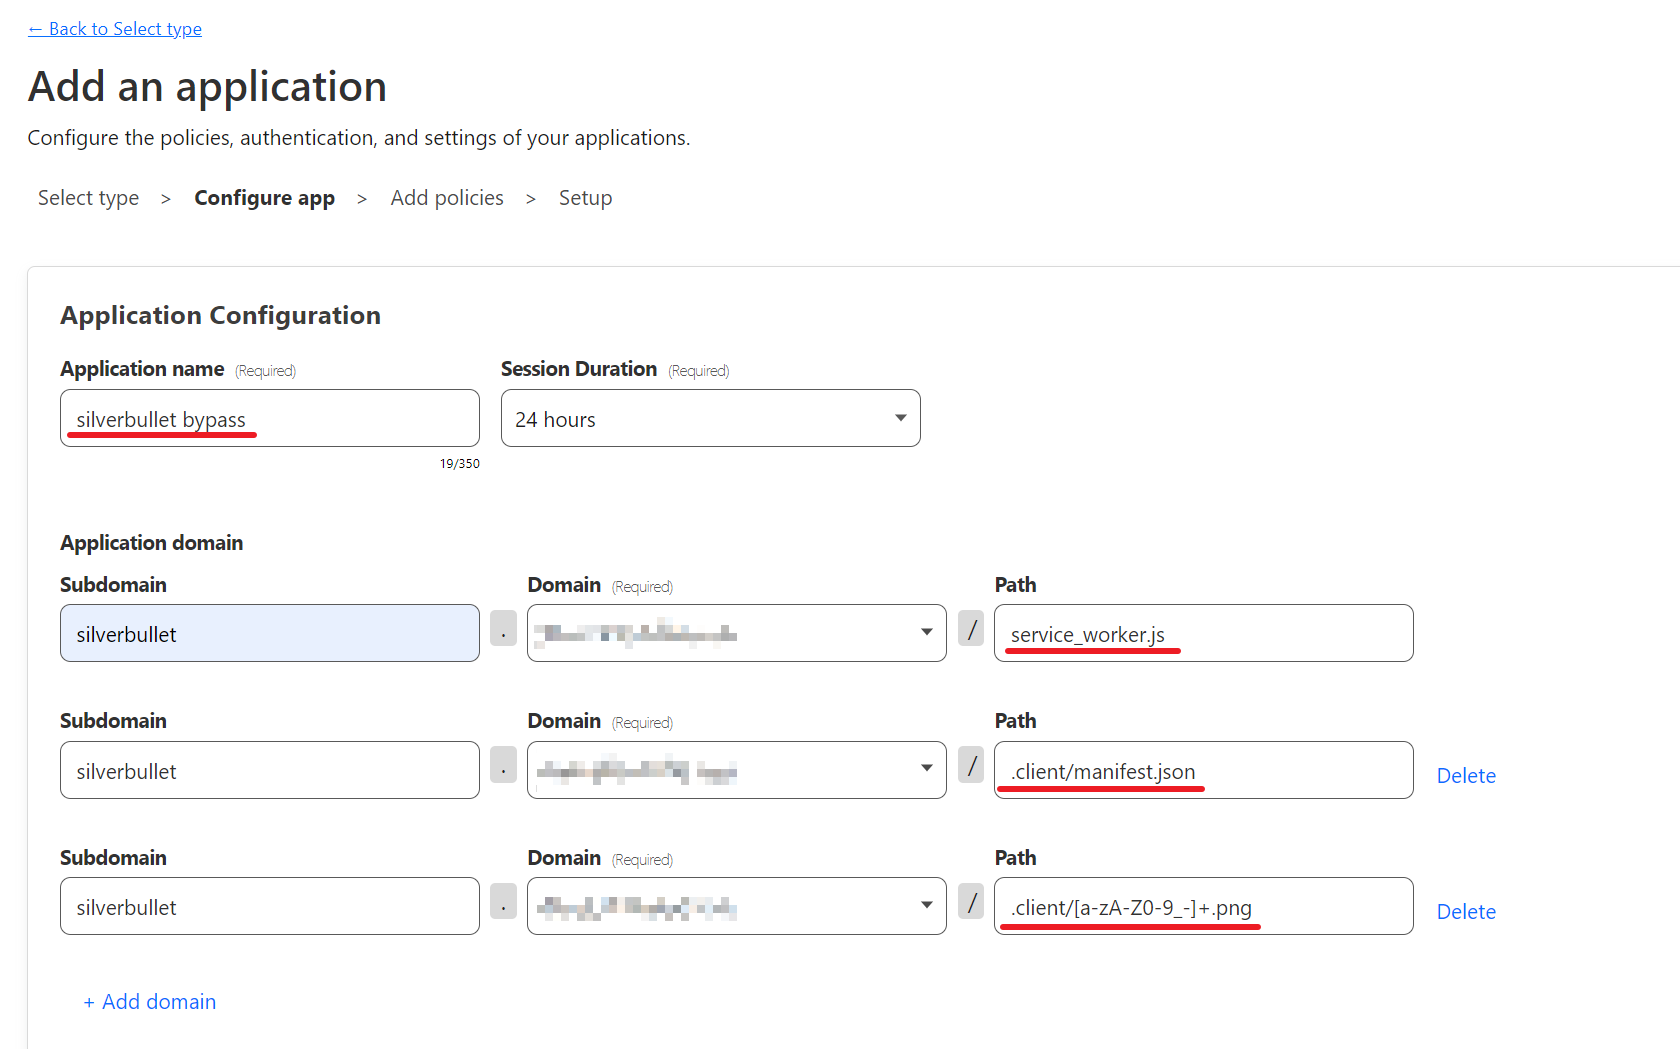
Going back to the Zero Trust overview, we are now going to create some special rules to allow some specific files from silverbullet without authentication. The same thing happens with other auth applications such as Authelia.
Create a new self-hosted application in Cloudflare, we suggest the name silverbullet bypass.
And add the following paths:
.client/manifest.json
.client/[a-zA-Z0-9_-]+.png
service_worker.js
Leave the rest as default and click Next at the bottom of the page.
For the policy name we suggest silverbullet bypass paths, as for the Action you need to select Bypass, and in the Configure Rules Select Everyone or you can exclude a range of IP’s or countries if required.
Leave the rest as default and click Next at the bottom of the page.

These rules only take effect on the specific paths, you can read more about Policy inheritance on Cloudflare.
On the next page, leave everything as default and click on Add Application at the bottom of the page.
Go and check your silberbullet.your-domain-name.com everything should be working correctly.
4. Disable caches
-
Go to your domain in CloudFlare
-
On the left bar => Cacheing => Cache rules => Create a cache rule
-
Call it whatever, for example: “Bypass cache for SB”
-
Select “Custom filter expression”, as a “Field” select “URI full” with Operator “wildcard” as Value enter “https://silverbullet.your-domain-name.com/*”
-
Cache eligibility should be
Bypass cache -
Save
-
On the left bar => Cacheing => Configuration => Custom purge
-
Purge by URL
-
Add your domain like this
https://silverbullet.domain.com/*
Alternatively you could Purge everything
Now the connection to silverbullet is HTTPS and PWA (Progressive Web Apps) and offline mode will work.
I hope this guide has been helpful.